Get ready for some spooky fun in the kitchen with these delightful Halloween cupcake cones! Imagine all the joy of a perfectly baked cupcake, but served in a crispy, edible cone. It’s a brilliant twist on a classic, and for Halloween, they’re a dream come true for creative bakers. These treats combine the ease of cupcakes with the novelty of a cone, making them a guaranteed hit at any Halloween party or family gathering. Whether you’re looking for kid-friendly halloween treats or impressive halloween dessert ideas, this guide will walk you through creating your own masterpieces. Let’s dive into the magic of these halloween cupcake cones recipe and explore some fun, creative halloween cupcakes that will be the talk of the town!
What Are Halloween Cupcake Cones?
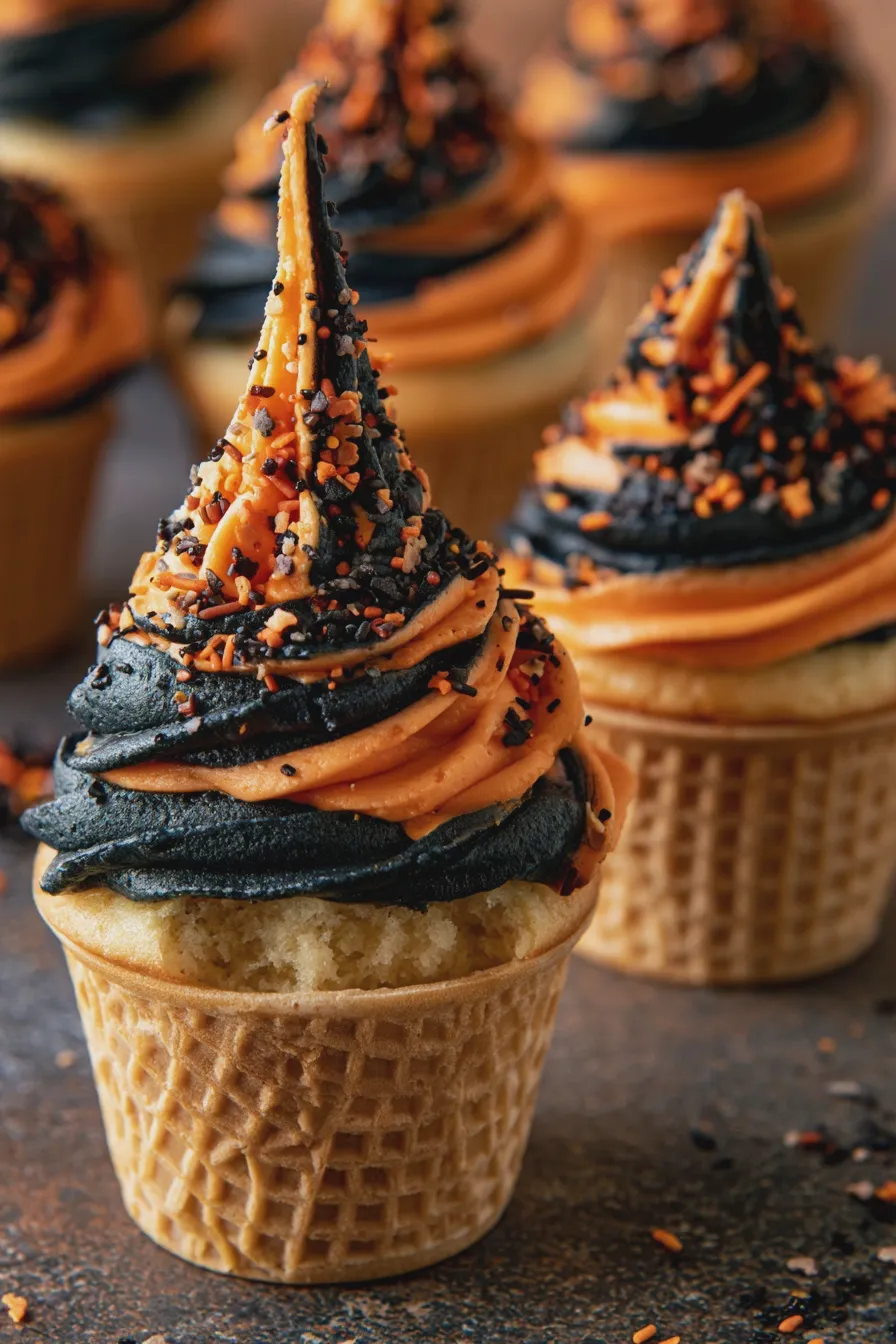
Halloween cupcake cones are exactly what they sound like: cupcakes baked directly into ice cream cones, then decorated with spooky and fun Halloween themes. Instead of a traditional paper liner, the cone itself acts as the vessel for your delicious cake batter. This makes them incredibly portable, less messy to eat, and a fantastic canvas for creative decorating. They’re a wonderful way to elevate your diy halloween cupcakes, offering a unique presentation that’s both charming and delicious. The edible cupcake cones are a fun surprise for guests, and the possibilities for decoration are endless, making them one of the most versatile halloween dessert ideas.
The beauty of these halloween cone cakes lies in their adaptability. You can use your favorite cake recipe – from a classic vanilla or chocolate to something more seasonal like pumpkin spice or red velvet. The cones themselves add a subtle crispness and sweetness that complements any cake flavor. Plus, the cone shape lends itself perfectly to a variety of spooky designs, from towering witch hats to creepy mummy wraps. For more information on baking basics, you might find cupcake baking tips helpful.
Why You’ll Love Making Halloween Cupcake Cones
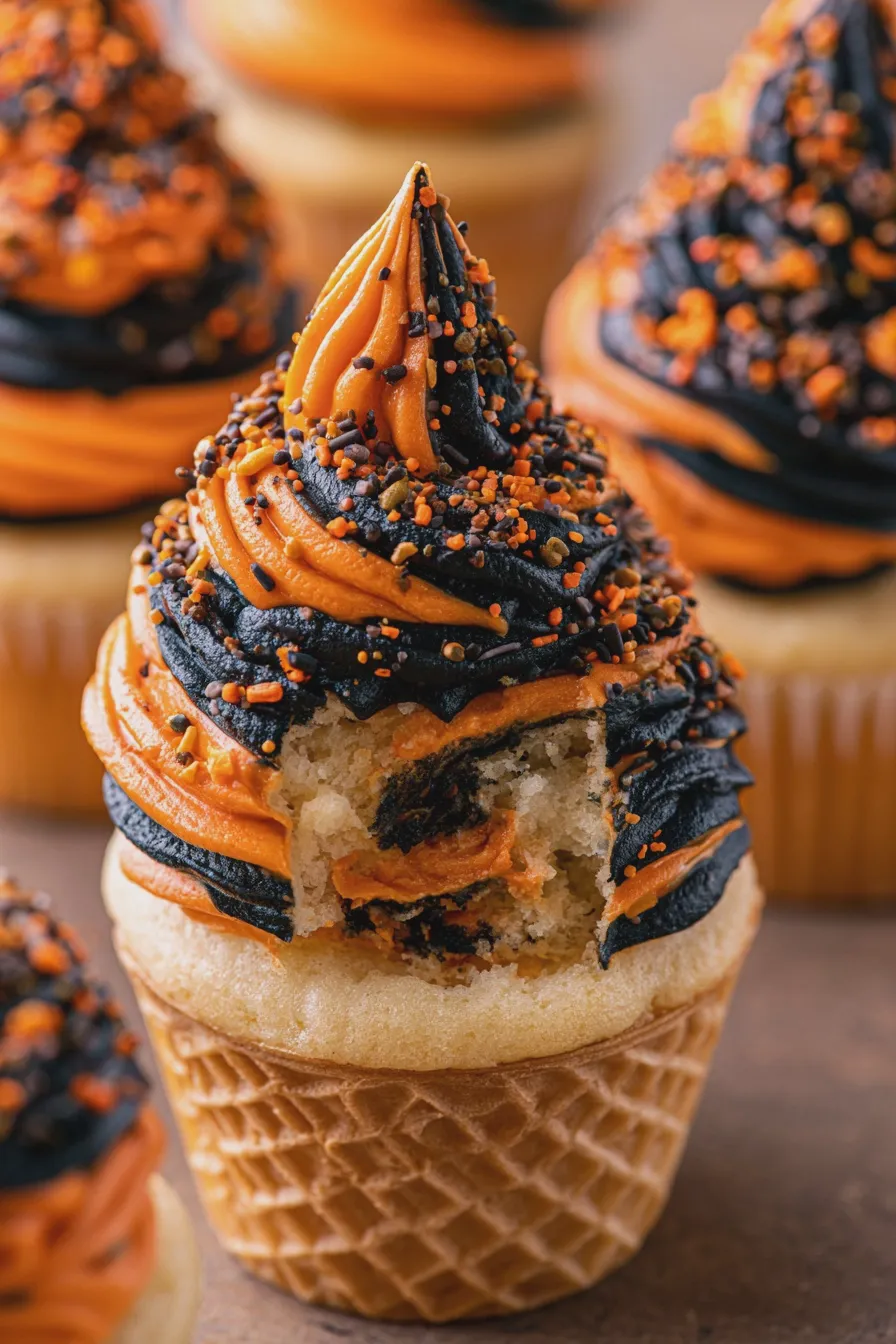
There are so many reasons why these halloween cupcake cones are a must-try. First, they’re incredibly fun to make, especially with kids. The decorating aspect is where the real magic happens, allowing for endless creativity. Second, they are inherently less messy than traditional cupcakes. No more frosting sliding off into fingers! The cone contains everything neatly. Third, they are budget-friendly and require fewer supplies. You skip the paper liners and often can use fewer piping bags for decorating.
Don’t miss out on our guide to How To Prepare A Cake Pan To Prevent Sticking.
These treats are also perfect for parties because they are self-contained. Guests can easily grab one and mingle without needing a plate. They are also fantastic for bake sales, as they stand out from the usual cupcakes. The novelty factor is high, ensuring they’ll be popular. If you’re looking for easy halloween baking ideas that pack a punch, these are it. They are a wonderful addition to any list of fun halloween desserts.
Choosing the Right Cones
The type of cone you choose will impact the final look and taste of your halloween cupcake cones. Sugar cones and waffle cones are the most popular choices. Sugar cones are generally smaller and have a thinner, crisper shell, making them ideal for individual servings and intricate decorating. Waffle cones are larger, sturdier, and have a thicker, sweeter shell, which can be great if you want a more substantial treat or a larger base for your spooky creations. Ensure you select cones that are fresh and not stale, as this will affect the texture.
For some truly creative halloween cupcake cones, consider using colored cones if you can find them, or even dipping the rims of plain cones in melted candy melts for an extra layer of flavor and color. This is a simple step that can significantly enhance the visual appeal of your spooky cupcake cones. Remember to handle cones gently, as they can be fragile.
If you enjoyed this, you might also love our Why Did My Cake Sink In The Middle recipe.
Selecting Your Cake Recipe
The best cake recipe for your halloween cupcake cones is one that bakes up moist and tender. A classic vanilla or chocolate cake is always a crowd-pleaser and works beautifully with the cone. For a more festive flavor, consider a pumpkin spice cake, a spiced apple cake, or even a rich red velvet for a dramatic effect. The key is to ensure your batter isn’t too thin, as it could leak through the cone, or too thick, making it difficult to fill.
A good rule of thumb is to use a recipe that yields a batter with a consistency similar to thick pancake batter. This will ensure it bakes evenly within the cone and doesn’t overflow. If you’re unsure about your batter consistency, a quick search for cake batter consistency can offer helpful visual guides. You want a batter that holds its shape but still flows easily into the cone.
Baking Your Halloween Cupcake Cones
Baking these cones is a bit different from traditional cupcakes, but it’s quite straightforward once you get the hang of it. The primary challenge is keeping the cones upright during baking. Here’s how to do it:
Another favorite of ours is the How To Make Ice Cream At Home.
Preparation is Key:
- Preheat your oven according to your chosen cake recipe’s instructions.
- Prepare your cake batter.
- Arrange your ice cream cones in a muffin tin. The muffin tin will provide a stable base to prevent the cones from tipping over. If the cones seem wobbly, you can wrap a bit of foil around the base of each cone inside the muffin tin cavity for extra support.
Filling the Cones:
- Fill each cone about two-thirds full with batter. Overfilling can cause the batter to overflow and bake onto the muffin tin, making removal difficult.
- You can use a spoon or a piping bag to fill the cones. A piping bag offers more control and can be less messy.
Baking and Cooling:
Another favorite of ours is the How To Fold Ingredients Without Deflating.
- Bake for the time specified in your recipe, or until a toothpick inserted into the center of the cake part of the cone comes out clean. Baking time might be slightly shorter than for traditional cupcakes due to the cone’s shape and material.
- Once baked, carefully remove the muffin tin from the oven. Let the cones cool in the muffin tin for a few minutes before transferring them to a wire rack to cool completely. This prevents them from breaking.
Common Mistakes to Avoid:
- Overfilling: This is the most common mistake. It leads to messy overflow and uneven baking. Stick to the two-thirds rule.
- Not supporting the cones: If cones aren’t stable, they will lean or fall, resulting in lopsided cakes. A muffin tin is your best friend here.
- Opening the oven door too early: This can cause your cakes to sink. Resist the urge to check too frequently, especially in the first two-thirds of the baking time.
- Cooling improperly: Allowing them to cool completely on a wire rack is crucial for preventing condensation and sogginess.
Decorating Your Halloween Cupcake Cones
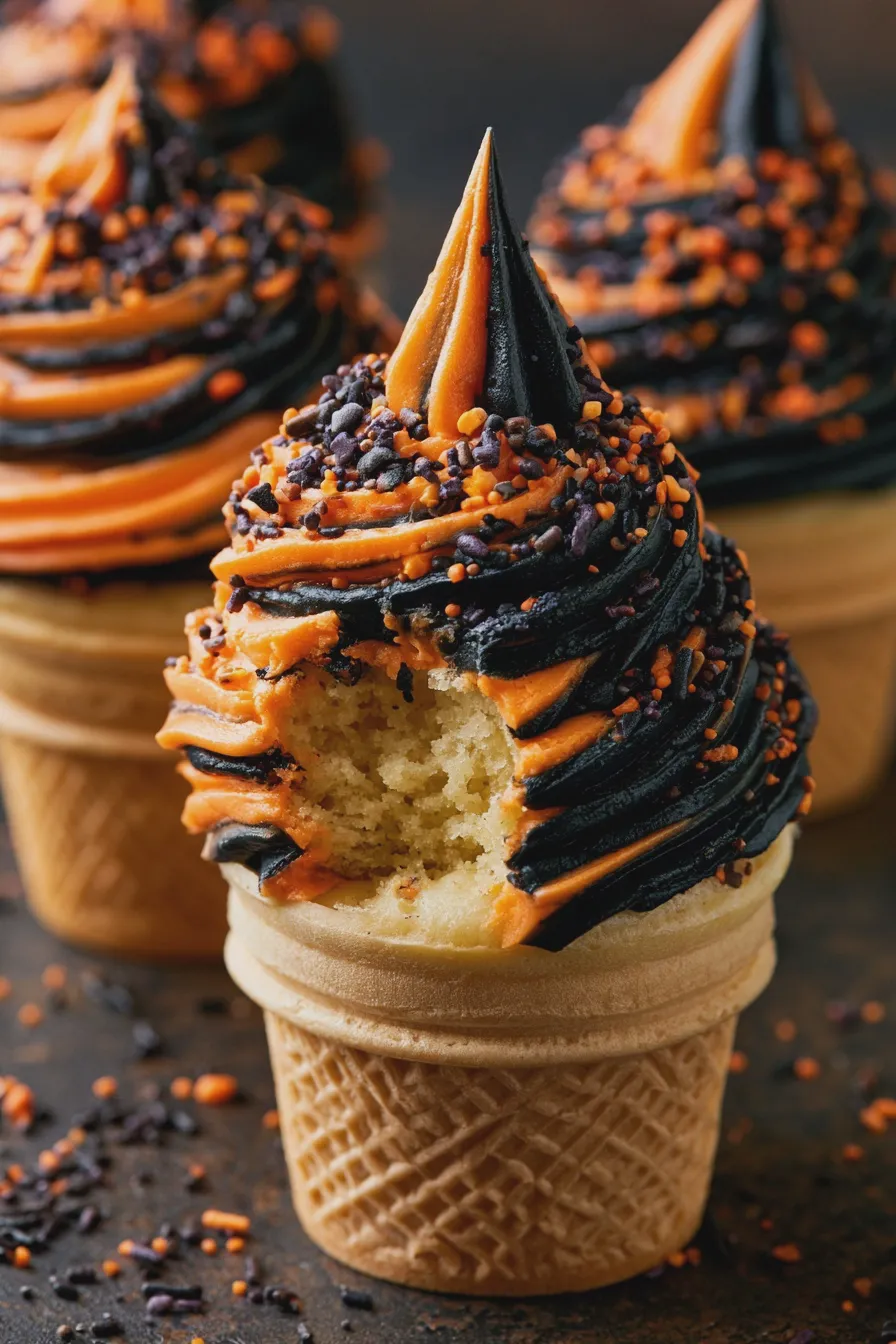
This is where the real fun begins! The decorating possibilities for your halloween cupcake cones are truly endless, allowing you to create a variety of spooky and fun designs. Here are some ideas to get you started:
Spooky Cupcake Cones Ideas:
- Mummy Cupcake Cones: Frost the cooled cones with white frosting. Use a piping bag with a thin round tip or a zip-top bag with a corner snipped off to create thin strips of white frosting that wrap around the cone, mimicking mummy bandages. Add two small dots of black frosting or edible candy eyes for the eyes. These are classic mummy treats!
- Ghost Cupcake Cones: Cover the cone in white frosting. You can create a smooth surface or add some texture. Then, use black edible marker or tiny black frosting dots for the eyes. For a more whimsical ghost, pipe a swirl of white frosting on top and then draw the eyes.
- Spider Web Cupcake Cones: Frost the cones with a base color like black, purple, or orange. Then, use white or contrasting colored frosting (or melted white chocolate) to pipe concentric circles on top. Drag a toothpick from the center outwards to create a spider web effect. Add a plastic spider for an extra spooky touch.
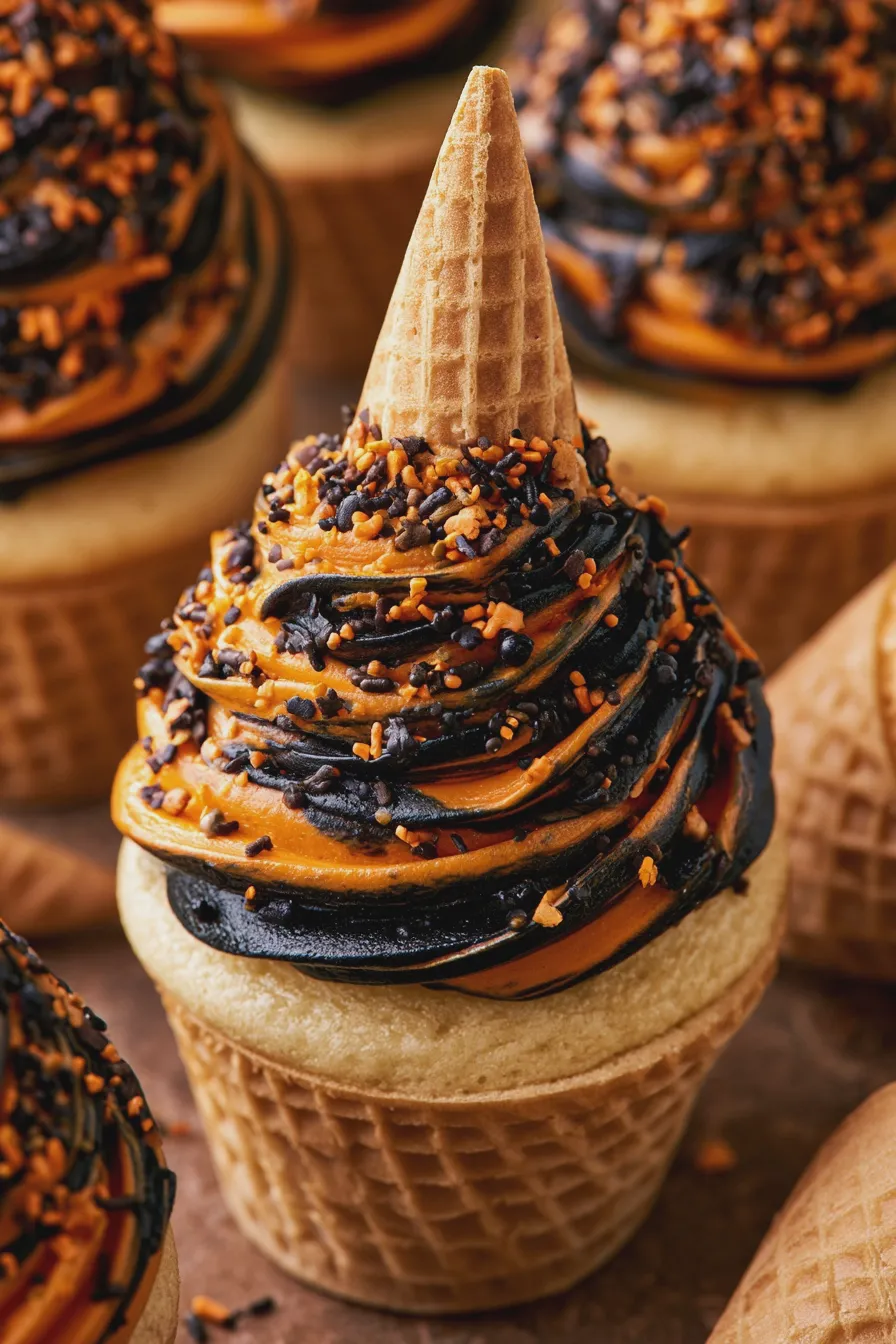
- Witch Cupcake Cones: Frost the cones with green or purple frosting. You can add some black frosting around the base to look like a witches’ cauldron or a skirt. For the hat, you can use a black candy melt cone or a small black wafer cone, and attach it to the top with frosting.
- Monster Cupcake Cones: Get creative with different colored frostings and edible candies. Pipe swirls of green, purple, or blue frosting. Add candy eyes, sprinkles, or even small gummy worms to create a fun monster look.
- Vampire Cupcake Cone: Frost with red frosting, and then add some black frosting to create a cape effect. You can also pipe small white fangs on the top.
- Skeleton Cupcake Cones: Frost with white or light gray frosting. Use black frosting to pipe out the eye sockets and nose cavity. Then, pipe small white frosting dots or lines to create the teeth and bone structure.
- Black Cat Cupcake Cones: Frost the cones completely in black frosting. Use green or yellow frosting for the eyes and a small pink frosting nose. You can add pointy black frosting ears or cut them out of black fondant.
- Candy Corn Cupcake Cones: This is a simpler, yet effective design. Divide your frosting into three colors: white, yellow, and orange. Frost the top third of the cone white, the middle third orange, and the bottom third yellow, mimicking the colors of candy corn.
Tips for Decorating:
Don’t miss out on our guide to How To Cream Butter And Sugar.
- Use a variety of piping tips: Different tips can create different textures and effects, from smooth swirls to spiky monster hair.
- Melted candy melts are your friend: They can be used to create dipped cone tops, add decorative elements, or even as edible glue.
- Edible decorations: Don’t forget sprinkles, edible glitter, candy eyes, small candies, and even edible markers to add details.
- Keep frosting consistent: If your frosting is too soft, it will be difficult to work with. If it’s too stiff, it will be hard to pipe. Adjust with a little more powdered sugar or liquid as needed.
Fun Variations and Additions
Beyond the decorating, there are several ways to make your halloween cupcake cones even more special. Consider adding a surprise inside!
- Filling the cones: Before adding the cake batter, you can place a small amount of frosting, a few chocolate chips, or even a piece of candy at the bottom of the cone. This adds an extra layer of flavor and a fun surprise when someone takes a bite.
- Flavor infusions: Experiment with different cake flavors. A chocolate cake with a hint of peppermint, or a vanilla cake with orange zest can add a unique twist.
- Gluten-Free and Vegan Options: These recipes can often be adapted for those with dietary restrictions. Use your favorite gluten-free flour blend or a vegan cake recipe. Ensure your cones are also suitable if needed.
- No-Bake Halloween Cupcakes: While this guide focuses on baked cones, you could also create no-bake versions. This would involve filling the cones with a no-bake cheesecake filling or a mousse and then decorating.
Serving Your Halloween Cone Cakes
Once your halloween cupcake cones are baked and beautifully decorated, it’s time to serve them! They are best enjoyed at room temperature. If you need to store them, keep them in an airtight container at room temperature for a day or two. Avoid refrigerating them if possible, as this can make the cones soft and the cake dry.
Presentation is key for these fun halloween desserts. Arrange them on a festive platter, perhaps surrounded by some candy corn or spooky-themed treats. They are perfect for a Halloween party dessert table, a classroom treat, or just a fun weekend baking project with the family. The visual appeal alone will wow your guests, and the delicious taste will ensure they’re a hit!
If you enjoyed this, you might also love our Creaming Method For Cakes And Cookies recipe.
Print
halloween cupcake cones recipe
- Total Time: PT45M
- Yield: 12 cupcake cones 1x
- Diet: Vegetarian
Description
Spooky and fun, these Halloween Cupcake Cones are a delightful treat that combines the joy of cupcakes with the convenience of a cone. Perfect for parties or a festive dessert!
Ingredients
- 1 ½ cups all-purpose flour
- 1 cup granulated sugar
- 1 ½ teaspoons baking powder
- ½ teaspoon salt
- ½ cup unsalted butter, softened
- 2 large eggs
- ½ cup milk
- 1 teaspoon vanilla extract
- 1 box (16 ounces) vanilla frosting
- Black food coloring
- Orange food coloring
- Halloween sprinkles
- Waffle cones
Instructions
- Preheat oven to 350°F (175°C). Line a muffin tin with cupcake liners.
- In a large bowl, whisk together flour, sugar, baking powder, and salt.
- Add softened butter and mix until the mixture resembles coarse crumbs.
- In a separate bowl, whisk together eggs, milk, and vanilla extract.
- Gradually add the wet ingredients to the dry ingredients, mixing until just combined. Do not overmix.
- Divide the batter evenly into the prepared cupcake liners, filling each about two-thirds full.
- Bake for 18-22 minutes, or until a toothpick inserted into the center comes out clean. Let cool in the muffin tin for a few minutes before transferring to a wire rack to cool completely.
- While the cupcakes cool, prepare the frosting. Divide the frosting into two bowls. Tint one bowl black and the other orange using food coloring.
- Once the cupcakes are completely cool, frost them. You can swirl the black and orange frosting together for a marbled effect, or frost them in solid colors.
- Decorate with Halloween sprinkles.
- To serve as cupcake cones, carefully insert the pointed end of a waffle cone into the bottom of each frosted cupcake.
Notes
- For an extra spooky touch, you can add candy eyes or edible glitter to your cupcake cones.
- Make sure the cupcakes are completely cool before frosting, otherwise the frosting will melt.
- If you don’t have waffle cones, you can also serve these as regular cupcakes.
- Prep Time: PT25M
- Cook Time: PT20M
- Category: Desserts
- Method: Baking
- Cuisine: American
Nutrition
- Serving Size: 1 cupcake cone
- Calories: 350
- Sugar: 35g
- Sodium: 200mg
- Fat: 18g
- Saturated Fat: 11g
- Carbohydrates: 45g
- Fiber: 1g
- Protein: 3g
- Cholesterol: 60mg