
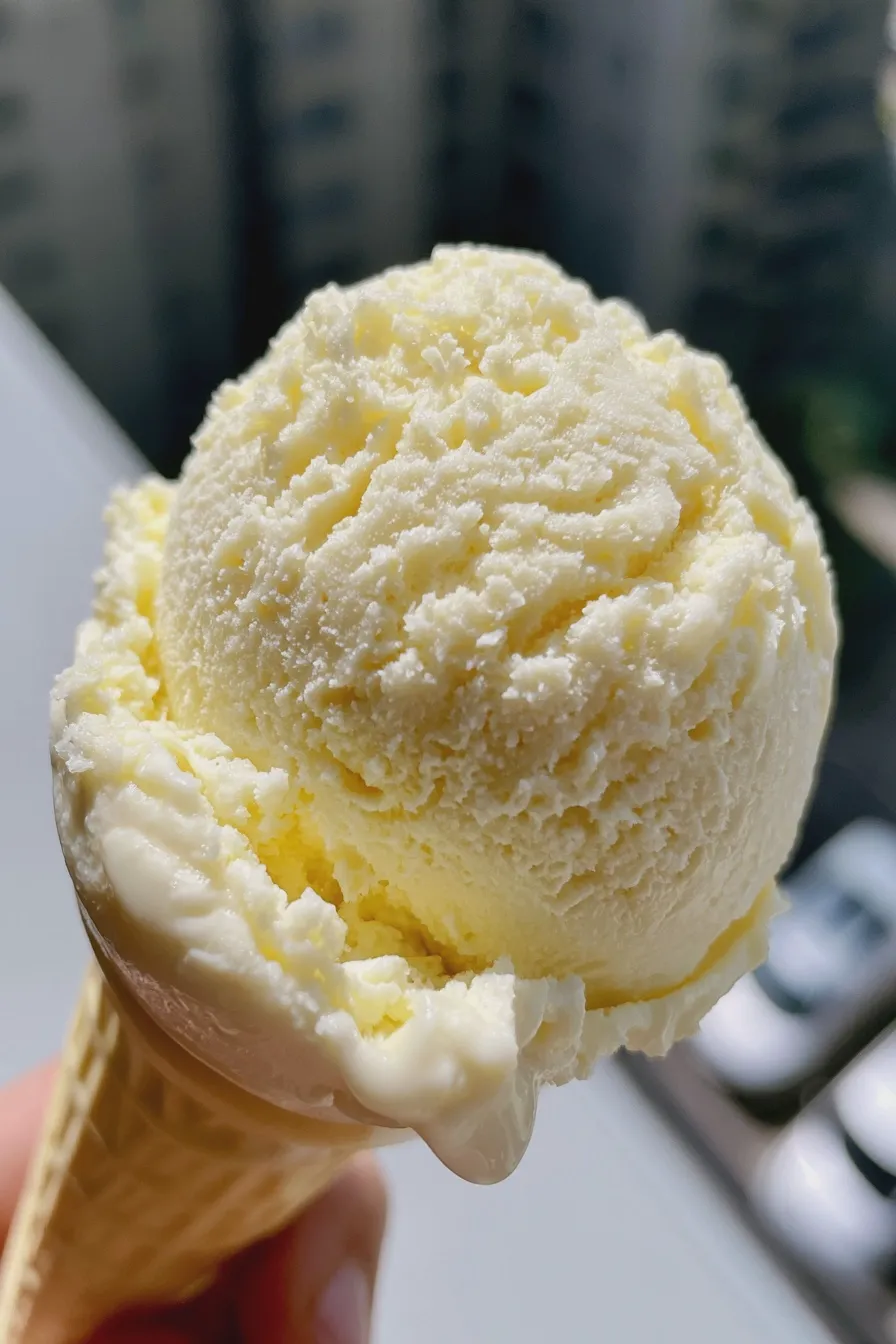

Learning how to make ice cream at home results in a delightfully creamy, customizable frozen treat that far surpasses most store-bought versions, especially when you master the basic custard-based ice cream technique. This classic method yields a rich, smooth texture perfect for pairing with summer desserts like strawberry cobbler or a slice of rich carrot cake with cream cheese frosting.
There is something truly satisfying about creating a perfect dessert from scratch, and mastering the fundamentals of frozen desserts is easier than you might think. We are going to walk through every critical step to ensure your first batch of homemade vanilla is a roaring success, giving you the confidence to explore raspberry lemon cupcakes next time.
Gathering Your Essentials for the Best Homemade Ice Cream Recipe
Before you begin mixing, ensure you have all your equipment ready; this recipe works best when you are prepared for the chilling stages, which are crucial for texture. If you are new to this process, you might find introductory guides on ice cream making basics helpful for understanding the science behind freezing dairy.
Required Equipment
For the traditional method we are using, a dedicated ice cream maker is highly recommended as it incorporates air while freezing, which prevents large ice crystals from forming. Make sure your ice cream maker’s freezer bowl has been thoroughly frozen according to the manufacturer’s instructions, usually for a minimum of 12 to 24 hours.
- Ice Cream Maker (with pre-frozen bowl)
- Medium Saucepan
- Whisk
- Large Bowl (for ice bath)
- Fine-mesh Sieve
- Airtight Freezer Containers
The Best Ice Cream Base Ingredients
This recipe focuses on a classic, rich custard-based ice cream, which uses egg yolks to create an incredibly smooth mouthfeel, distinguishing it from fudgy spring brownies which rely on dense chocolate structure.
- Heavy Cream: 2 cups
- Whole Milk: 1 cup (Do not substitute with low-fat milk; the fat content is essential for creaminess.)
- Granulated Sugar: 3/4 cup
- Egg Yolks: 4 large (These create the stable emulsion, making this a true oatmeal cookies-level home project.)
- Pure Vanilla Extract: 2 teaspoons (Use high-quality extract for the best natural ice cream flavors.)
- Pinch of Salt: Enhances the sweetness and complexity.
Preparing the Custard-Based Ice Cream Base
Creating a proper custard base, often referred to as crème anglaise, is the secret to achieving that professional, velvety texture that defines the strawberry shortcake easter egg balls-level quality in your frozen desserts.
Heating the Dairy
In your medium saucepan, combine the heavy cream, whole milk, and half of the sugar, heating over medium heat until small bubbles just begin to form around the edges.
Do not allow the mixture to boil, as overheating can scorch the milk; once steaming gently, remove the pan from the heat immediately to prevent scorching.
Tempering the Egg Yolks
While the dairy heats, whisk the remaining sugar and the egg yolks together vigorously in a separate bowl until the mixture becomes pale yellow and slightly thickened, a process known as ribboning.
Slowly drizzle about one cup of the hot dairy mixture into the egg mixture while whisking constantly; this vital step, called tempering, gently raises the temperature of the eggs so they don’t scramble.
Cooking the Custard
Pour the tempered egg mixture back into the saucepan with the remaining dairy and return the pan to low heat, stirring continuously with a wooden spoon or spatula.
Cook until the custard thickens enough to coat the back of the spoon, reaching about 170°F; if you draw a line through the custard on the spoon, the line should hold its shape momentarily, signaling a perfect best ice cream base.
Chilling the Base Thoroughly
Strain the finished custard immediately through a fine-mesh sieve into a clean bowl set over an ice bath to halt the cooking process and cool it rapidly.
Once cooled slightly, stir in the vanilla extract and salt, then cover the bowl tightly and refrigerate for at least 4 hours, though overnight chilling yields the absolute best results for churning ice cream tips.
Churning the Ice Cream
This stage is where the magic happens, transforming your chilled liquid base into something scoopable, and it is the primary difference between this method and no churn ice cream.
Using the Ice Cream Maker
Pour the thoroughly chilled base into your ice cream maker, following the specific instructions for your model, ensuring the machine is running before adding the liquid.
Churn the mixture for about 20 to 30 minutes, or until it reaches the consistency of soft-serve ice cream; this process incorporates the necessary air, known as overrun.
Flavor Variations and Mix-Ins
If you desire mix-ins like chocolate chips, crushed cookies, or fruit purees, add them during the last five minutes of churning so they are evenly distributed without breaking down too much.
For natural ice cream flavors beyond vanilla, consider steeping citrus zest or mint leaves in the dairy mixture while it heats, straining them out before tempering the eggs.
The Final Freeze: Hardening Your Homemade Ice Cream
The texture right out of the machine is soft and delicious, but it requires further freezing to achieve the firm scoopable consistency you expect from commercial products.
Transferring to Storage Containers
Transfer the soft ice cream from the machine into shallow, airtight freezer containers, leaving about half an inch of space at the top for slight expansion during freezing.
Pressing a piece of plastic wrap directly onto the surface of the ice cream before sealing the lid helps prevent ice crystal formation and freezer burn, which is key for preserving homemade ice cream.
Hardening Time
Place the sealed containers in the coldest part of your freezer, avoiding the door where temperatures fluctuate most often, and allow them to harden for at least 4 hours.
If you find your ice cream becomes rock-hard, you may need to experiment with slightly reducing the sugar next time, as sugar acts as an antifreeze, or simply let it sit on the counter for 5 to 10 minutes before serving.
Serving and Storing Your Frozen Delight
Serving homemade frozen desserts is wonderfully flexible; you can top them with anything from homemade caramel sauce to fresh berries for a delightful contrast.
Serving Suggestions
Always allow the finished ice cream to temper on the counter for 5 to 10 minutes before scooping for the best texture; this brief softening makes serving much easier.
Consider serving scoops alongside warm baked goods, perhaps a slice of oatmeal cookies for a comforting end to a meal, or try making easy homemade frozen yogurt for a tangier treat.
Storage Tips
Stored properly in a tightly sealed, dedicated freezer container, this custard-based ice cream will maintain excellent quality for up to two weeks.
For longer storage, consider using specialized containers designed to minimize air exposure, or wrap the container tightly in foil before placing it back into the deep freeze.
Print
how to make ice cream at home Easy Recipe
- Total Time: PT4H35M
- Yield: About 1 Quart 1x
- Diet: Vegetarian
Ingredients
- 2 cups Heavy Cream
- 1 cup Whole Milk
- ¾ cup Granulated Sugar
- Pinch of Salt
- 1 Vanilla Bean, split lengthwise, seeds scraped (or 2 tsp pure vanilla extract)
- 5 large Egg Yolks (for traditional method only)
Instructions
- Prepare the Base (Traditional Custard): In a medium saucepan, combine the heavy cream, whole milk, salt, and half of the sugar. If using a vanilla bean, scrape the seeds into the mixture and toss the pod in as well. Heat over medium heat until steaming, but do not boil. Remove from heat.
- Temper the Yolks: In a separate bowl, whisk the egg yolks and remaining sugar until pale and slightly thickened. Slowly drizzle about 1 cup of the hot cream mixture into the yolks while whisking constantly to temper them.
- Cook the Custard: Pour the tempered yolk mixture back into the saucepan with the remaining cream. Cook over low heat, stirring constantly with a wooden spoon or spatula, until the mixture thickens enough to coat the back of the spoon (reaching about 175°F / 80°C). Do not boil.
- Chill: Strain the custard through a fine-mesh sieve into a clean bowl to remove the vanilla pod. Stir in vanilla extract if using extract instead of a bean. Cover the surface directly with plastic wrap and chill in the refrigerator for at least 4 hours, or preferably overnight, until completely cold.
- Churn (Ice Cream Maker Method): Pour the chilled base into your pre-frozen ice cream maker bowl and churn according to the manufacturer’s instructions (usually 20–30 minutes) until it reaches the consistency of soft-serve.
- No-Churn Method: Whip 1 cup of the chilled heavy cream until stiff peaks form. Gently fold the remaining chilled cream mixture (without the egg yolks, if using the custard base) into the whipped cream until just combined. Pour into a freezer-safe container, cover, and freeze for at least 6 hours, stirring every hour for the first 3 hours for a smoother texture.
- Ripen: Transfer the churned or set ice cream to an airtight container and freeze for an additional 2–4 hours to fully harden (ripen) before serving.
Notes
- For the No-Churn method, you can skip the egg yolks entirely and simply combine 1.5 cups of cold heavy cream, 1 cup of cold whole milk, and the sugar/vanilla, then proceed with whipping the cream and folding it in.
- If you prefer a stronger vanilla flavor, add 1 teaspoon of pure vanilla extract right before chilling the base.
- Allow ice cream to sit on the counter for 5–10 minutes before scooping for the perfect texture.
- Prep Time: PT20M
- Cook Time: PT15M
- Category: Ice Cream
- Method: Churned or No-Churn
- Cuisine: American
Nutrition
- Serving Size: ½ cup
- Calories: 320
- Sugar: 25g
- Sodium: 45mg
- Fat: 22g
- Saturated Fat: 13g
- Carbohydrates: 27g
- Protein: 5g
- Cholesterol: 120mg







