
Get ready to add a touch of delightful spookiness to your next gathering with our guide to making incredible eyeball cake pops! These treats are perfect for Halloween parties, birthday celebrations, or any occasion where you want to serve something fun and memorable. They combine the beloved cake pop format with a playful, slightly creepy aesthetic that’s sure to be a hit. Whether you’re a seasoned baker or just starting out, this guide will walk you through every step, from baking the cake to the final, eerie decorations. We’ll cover everything you need to know to create these eye-catching delights, ensuring your guests are impressed and delighted. For more inspiration on creative baking, check out these novelty cakes.
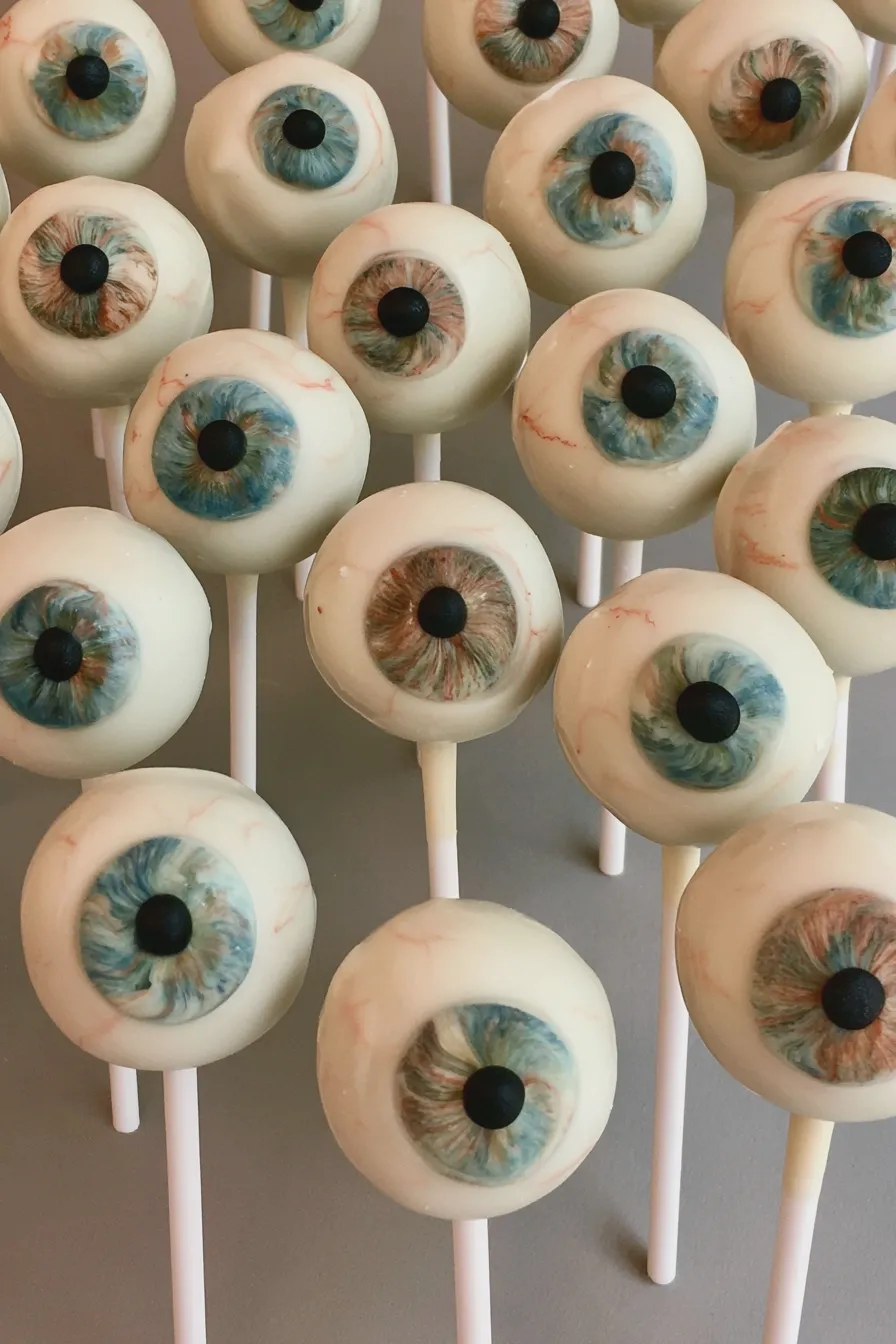
This comprehensive guide will break down the process into manageable steps, offering practical tips and tricks to ensure your eyeball cake pops turn out perfectly. We’ll discuss the best cake and frosting combinations, how to achieve the right consistency for dipping, and, of course, the art of decorating them to look like realistic (or whimsically creepy!) eyeballs. Let’s dive into the world of spooky sweets and create some truly unforgettable dessert recipes for parties!
The Perfect Base for Your Eyeball Cake Pops
The foundation of any great cake pop is, well, the cake! For eyeball cake pops, you have a lot of flexibility. A classic chocolate cake pop or a moist vanilla cake pop are always crowd-pleasers. The key is to bake a cake that is sturdy enough to hold its shape when crumbled and rolled, but still tender and delicious. You don’t want a cake that’s too crumbly or too dense.
A good starting point is your favorite cake recipe. If you’re looking for something easy, a box mix can work wonders, especially when enhanced with a few extra ingredients. For instance, adding an extra egg or replacing the water with milk can boost the richness and moisture. When baking, ensure your cake is fully cooled before you begin crumbling. This is crucial for the texture of your cake pop mixture. For more insights into baking cakes, you might find cake baking techniques helpful.
Choosing Your Cake Flavor
While chocolate and vanilla are classic choices for your cake pops, don’t be afraid to experiment! A red velvet cake would be wonderfully spooky, especially if you plan to make monster cake pops with red accents. A lemon cake could offer a bright contrast to the rich chocolate coating. For Halloween cake pops, consider flavors that align with the season, like pumpkin spice or even a subtle gingerbread.
The Importance of Crumb Coating
Once your cake is baked and completely cooled, it’s time to crumble it. You want fine crumbs, almost like damp sand. This is where the magic of binding begins. Add your frosting – buttercream frosting is the most common choice, but cream cheese frosting can also add a lovely tang, especially with vanilla or red velvet cake. Start with a small amount of frosting and mix it in gradually until the mixture holds together when you squeeze it. It should be pliable but not sticky.
If you enjoyed this, you might also love our How To Prepare A Cake Pan To Prevent Sticking recipe.
Tip: If your cake mixture is too dry and crumbly, add a little more frosting, a tablespoon at a time. If it’s too wet and sticky, add a few more cake crumbs or a tablespoon of powdered sugar. The goal is a consistency that allows you to roll balls without them falling apart or sticking excessively to your hands.
Mistake to Avoid: Don’t overmix the frosting into the cake crumbs. You want it just combined enough to bind the crumbs. Overmixing can make the cake pops dense and gummy.
Rolling and Chilling Your Cake Pop Balls
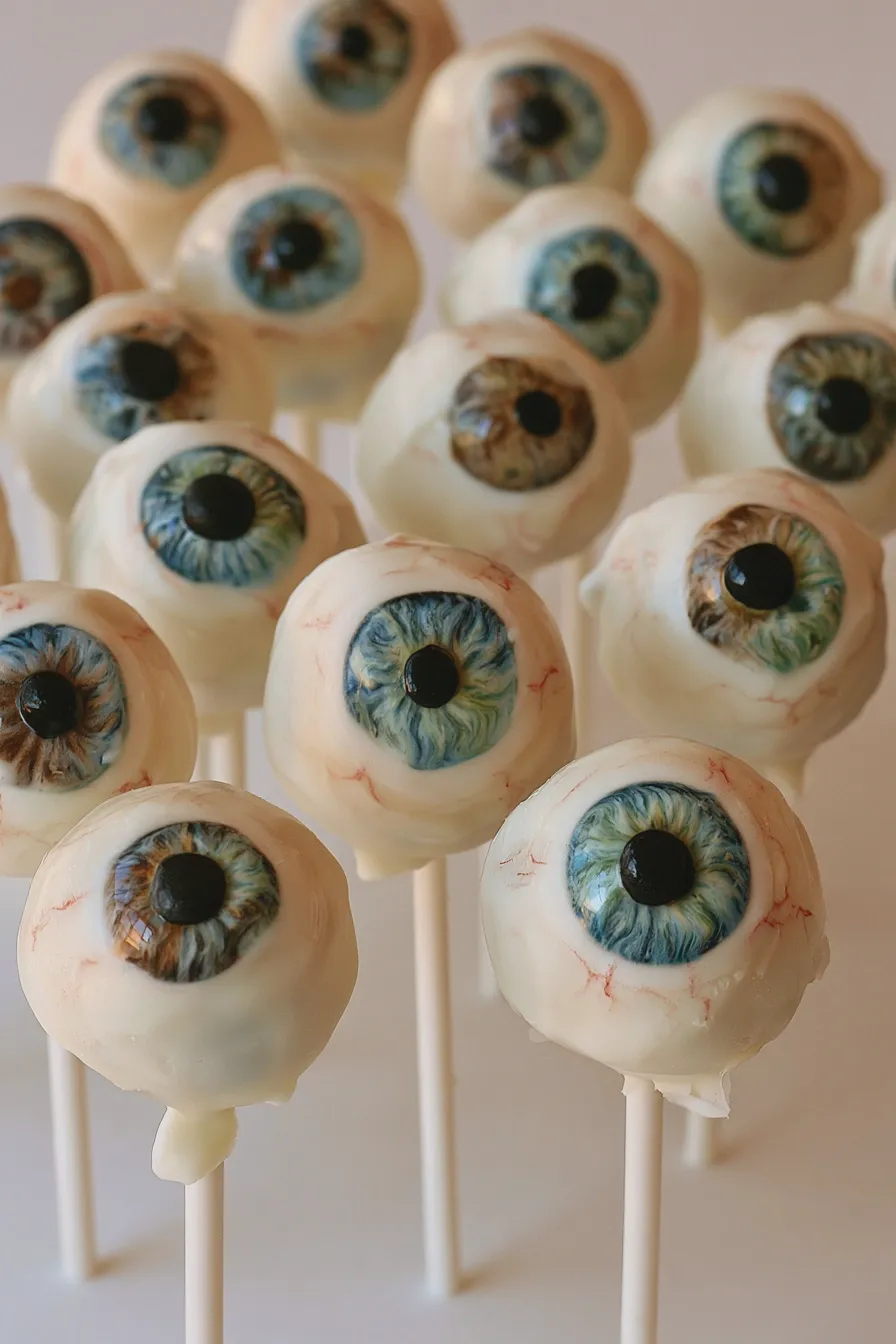
Now comes the satisfying part: rolling the cake mixture into balls! Aim for uniform sizes, about 1 to 1.5 inches in diameter. This ensures even coating and a consistent look for your eyeball cake pops. Use a cookie scoop or a tablespoon to measure portions of the mixture for consistency.
Once rolled, place the cake balls on a baking sheet lined with parchment paper. At this stage, you have a decision to make regarding the “eyeball” effect. If you want them to look like round eyeballs, simply roll them into perfect spheres. If you want a slightly more elongated or varied shape, you can gently press them or roll them into slightly oval shapes. This is also where you can start thinking about your spooky cake pops – perhaps a few can be slightly flattened on one side to create a more monstrous look.
Tip: Chilling the rolled cake balls is a critical step. Place the baking sheet in the refrigerator for at least 30 minutes, or in the freezer for about 15 minutes. This firms them up, making them easier to dip and preventing them from losing their shape.
Another favorite of ours is the Why Did My Cake Sink In The Middle.
Melting and Dipping for a Smooth Finish
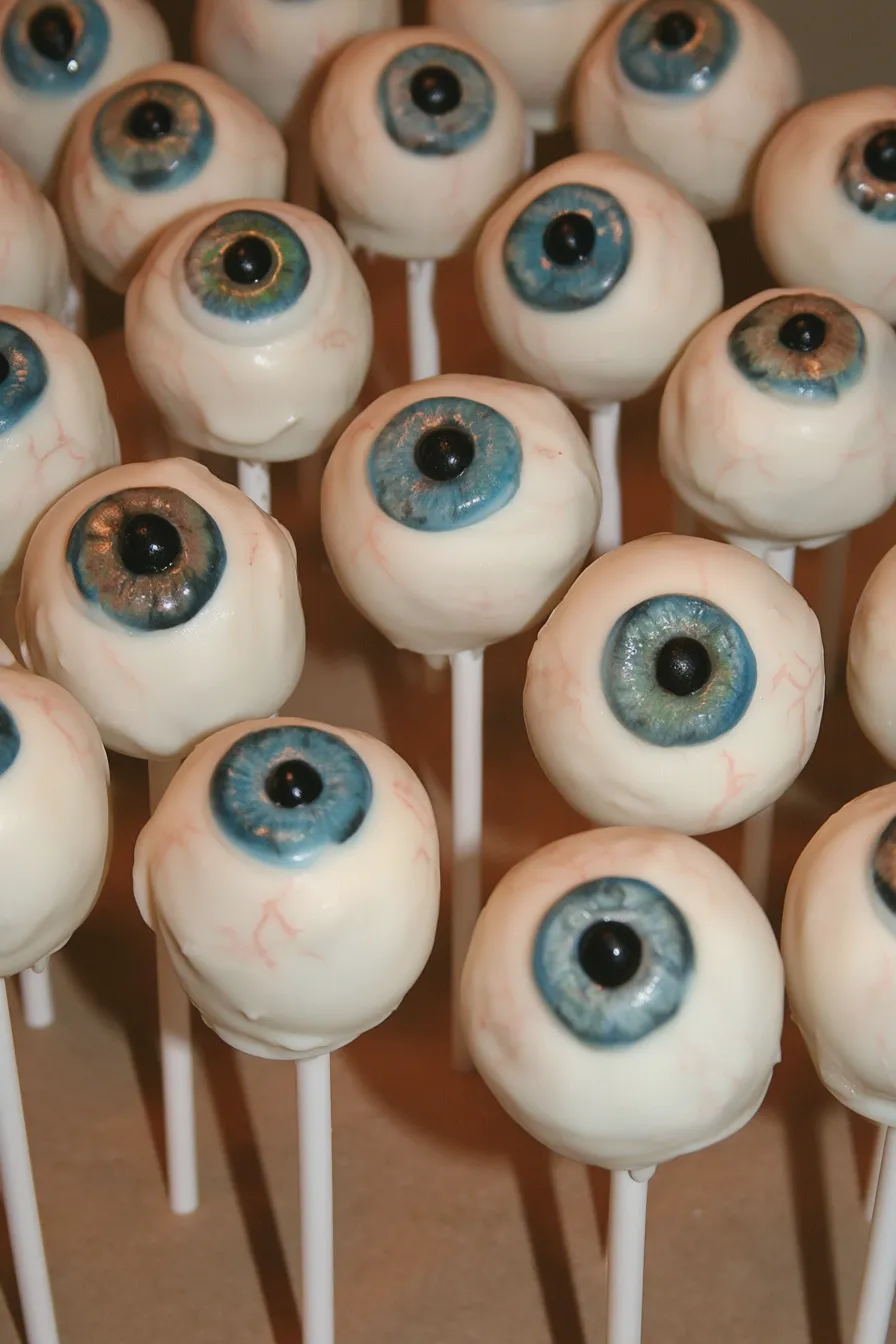
The coating is what gives cake pops their signature look and delicious crunch. Candy melts are the go-to for cake pops because they melt smoothly, set quickly, and come in a variety of colors. You can also use chocolate chips, but they often require adding a bit of shortening or oil to achieve the right dipping consistency.
Melt your candy melts or chocolate chips according to package directions. The microwave is usually the easiest method: heat in short intervals (30 seconds), stirring well after each interval, until smooth. Be careful not to overheat, as this can cause them to seize or burn.
Tip: For a thinner, more fluid coating that’s easier to dip, you can add a teaspoon or two of vegetable oil or melted coconut oil to your melted candy. Stir until fully incorporated. This helps achieve a smooth, even coat on your cake pops.
Baking Explanation: Candy melts are made with vegetable oil and have a different fat composition than chocolate, which allows them to set harder and faster at room temperature without needing to be tempered like real chocolate. This makes them ideal for beginners and for achieving a clean finish on cake pops.
Dip each chilled cake ball into the melted coating. Use a spoon to help coat it completely, then gently lift it out. Allow excess coating to drip back into the bowl. You can tap the stick gently on the side of the bowl to help smooth the coating. Place the dipped cake pop back on the parchment-lined baking sheet.
Looking for more? Try this delicious Zucchini Cake With Cream Cheese Frosting next.
Mistake to Avoid: Dipping warm cake balls into the melted coating. Always ensure your cake balls are well-chilled. Also, avoid over-dipping; too much coating can make the cake pops heavy and difficult to handle.
Eyeball Cake Pop Decorating Ideas
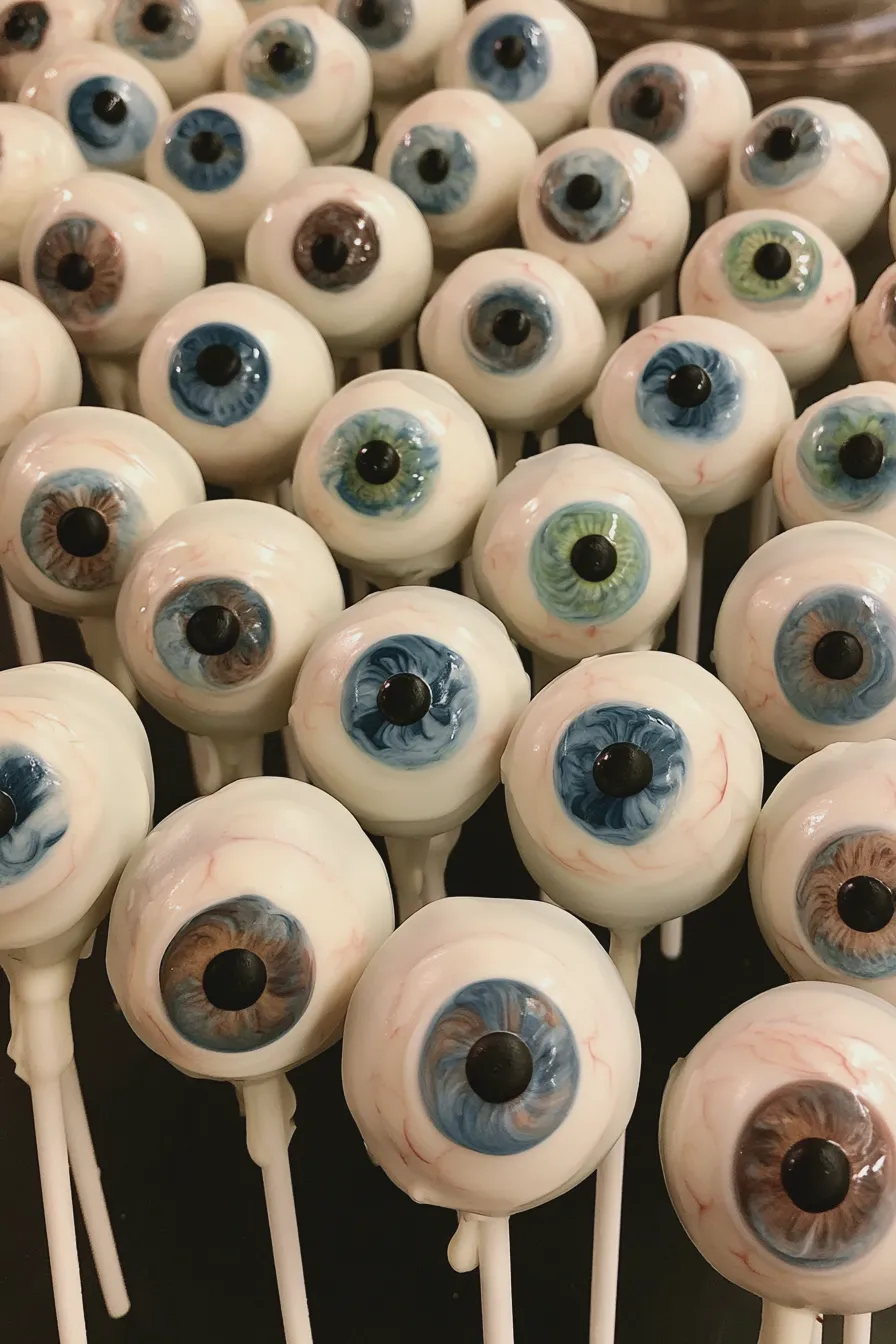
This is where your creativity shines! Turning your dipped cake pops into convincing (or fun!) eyeballs is surprisingly simple. You’ll need a few key supplies:
- Edible eyeballs (available at most craft stores or online)
- Food coloring for decorating (gel colors are best for vibrant hues)
- A small piping bag or a toothpick
- Optional: Black edible marker
Option 1: The Classic Eyeball
Once the base coating has set slightly but is still a little soft (this is called “tacky”), gently press one or two edible eyeballs onto the surface. If you want to add a bit more detail, you can use a small amount of melted candy melt or frosting to “glue” the edible eyeballs in place. For a more realistic look, consider adding a few thin lines of red food coloring around the eyeball with a fine brush or toothpick to mimic blood vessels.
Option 2: Hand-Painted Eyes
If you enjoyed this, you might also love our Carrot Cake With Cream Cheese Frosting recipe.
If you can’t find edible eyeballs, you can paint them on! Use gel food coloring diluted slightly with a clear extract (like lemon or vanilla extract) or a bit of vodka (the alcohol evaporates). Use a fine-tipped brush to paint a circle for the iris, then add a black pupil in the center. You can also add tiny white dots for a highlight, making the eyes look more alive. This method allows for endless variations in color and pupil size, making for truly unique monster cake pops.
Option 3: Multi-Colored Eyeballs
Dip your cake pops in a base color (white, blue, green, or even red for a gory dessert effect). Once set, use contrasting colors to paint on irises and pupils. For example, dip in white, then paint a blue iris and a black pupil. Or dip in black, then add a vibrant green iris and a white pupil.
Option 4: Spooky Variations
Don’t limit yourself to just eyeballs! For Halloween cake pops, you can:
If you enjoyed this, you might also love our How To Make Ice Cream At Home recipe.
- Add sprinkles for texture.
- Drizzle contrasting colors over the dipped cake pops.
- Use a black edible marker to draw cracks or stitches for a Frankenstein-inspired look.
- Create “bloody” effects by drizzling red candy melts or edible paint.
- Use different colored candy melts to create various monster faces.
Tip: Work in batches. Dip and decorate a few cake pops at a time so the coating doesn’t fully set before you add your decorations. If the coating hardens too much, you can gently re-melt it.
Baking Explanation: Gel food coloring is concentrated and provides vibrant colors without adding too much liquid, which can affect the consistency of your frosting or melted candy. A tiny amount goes a long way!
Making Your Eyeball Cake Pops Stand Out
Presentation is key for these fun party treats. Here are some ways to make your eyeball cake pops truly memorable:
- Sticks: Use colorful lollipop sticks or even black sticks for a more dramatic effect.
- Arrangement: Display your cake pops upright in a decorative vase, a Styrofoam block covered in foil, or a custom-made stand.
- Themed Packaging: If giving them as favors, use cellophane bags tied with ribbon or small boxes.
- Complementary Treats: Serve your eyeball cake pops alongside other no-bake Halloween treats or easy Halloween desserts for a complete dessert table.
Creative Dessert Ideas: Think about combining different “eye” colors and pupil sizes to create a collection of unique characters. Some can look surprised, others menacing, and some just plain silly! This adds a dynamic element to your dessert display.
Storing Your Spooky Creations
Once decorated, allow the cake pops to dry completely. Store them in an airtight container at room temperature. If your kitchen is particularly warm, or if you’ve used a frosting that requires refrigeration (like cream cheese frosting), it’s best to store them in the refrigerator. However, be aware that refrigeration can sometimes affect the texture of the coating, making it prone to condensation when brought back to room temperature.
If you enjoyed this, you might also love our How To Fold Ingredients Without Deflating recipe.
Tip: To prevent condensation when refrigerating, place the cake pops in the fridge uncovered for about 15-20 minutes, then cover them tightly with plastic wrap or place them in an airtight container. This gradual cooling helps minimize moisture buildup.
Print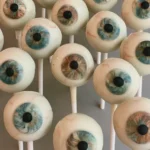
Eyeball Cake Pops Recipe for Spooky Sweet Treats
Description
These spooky eyeball cake pops are the perfect festive treat for Halloween! They’re surprisingly easy to make and are sure to be a hit with kids and adults alike.
Ingredients
- 1 box (15.25 oz) vanilla cake mix, plus ingredients called for on the box (eggs, oil, water)
- 1/4 cup (1/2 stick) unsalted butter, softened
- 1/2 cup cream cheese, softened
- 1 teaspoon vanilla extract
- 4 cups powdered sugar, sifted
- 1/4 cup milk
- 12 oz white candy melts
- 12 oz black candy melts
- Assorted food coloring (red, blue, green, brown)
- 24 lollipop sticks
Instructions
- Preheat oven according to cake mix instructions. Prepare cake mix as directed and bake in a 9×13 inch baking pan. Let cool completely.
- Crumble the cooled cake into a large bowl.
- In a separate bowl, cream together the softened butter and cream cheese until smooth. Add the vanilla extract.
- Gradually add the sifted powdered sugar to the butter and cream cheese mixture, alternating with the milk, until a thick frosting forms.
- Add the cake crumbs to the frosting and mix until well combined and the mixture holds together.
- Roll the cake mixture into 1-inch balls and place them on a parchment-lined baking sheet. Chill in the refrigerator for at least 30 minutes.
- Melt the white candy melts in a microwave-safe bowl according to package directions. Dip the tip of each lollipop stick into the melted white chocolate and insert it about halfway into each cake ball. Re-chill for another 15 minutes to secure the sticks.
- Melt the black candy melts in a separate microwave-safe bowl.
- Dip each chilled cake ball into the melted white chocolate, ensuring it’s fully coated. Let excess chocolate drip off. Place back on the parchment-lined baking sheet.
- While the white coating is still wet, use a toothpick to gently create an ‘iris’ effect by swirling in small amounts of colored candy melts or food coloring. For the ‘pupil’, dip the tip of a toothpick into the melted black candy melts and place a small dot in the center. Alternatively, you can use a small amount of black frosting.
- Allow the cake pops to set completely.
Notes
- For a more vibrant iris, you can use different colored candy melts and carefully swirl them into the wet white coating.
- Ensure your cake balls are well chilled before dipping to prevent them from falling apart.
- Store cake pops in an airtight container at room temperature for up to 3 days.
Nutrition
- Calories: 250
- Sugar: 25g
- Sodium: 75mg
- Fat: 15g
- Carbohydrates: 30g
- Fiber: 1g
- Protein: 2g
- Cholesterol: 20mg







