")
Table of Contents
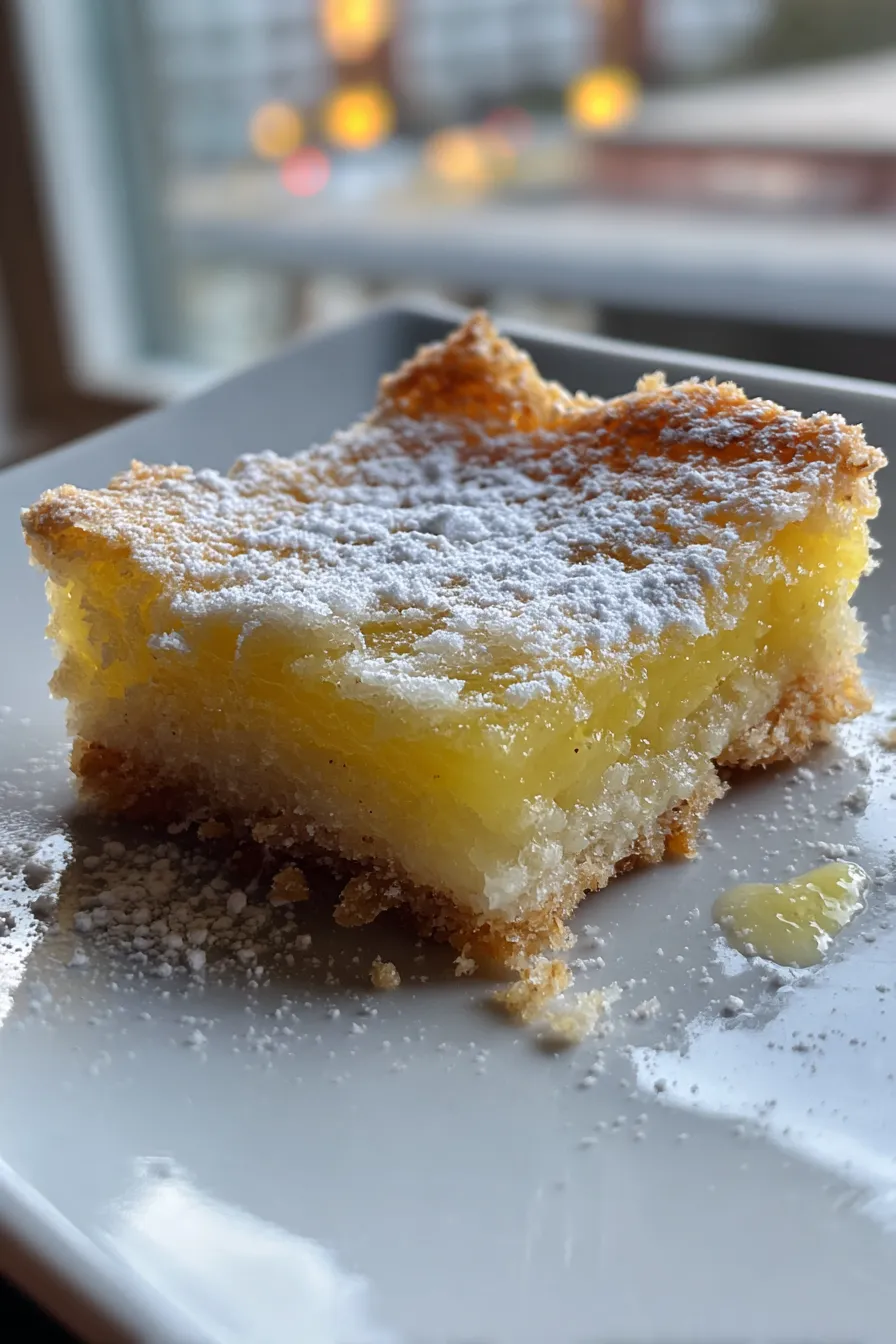
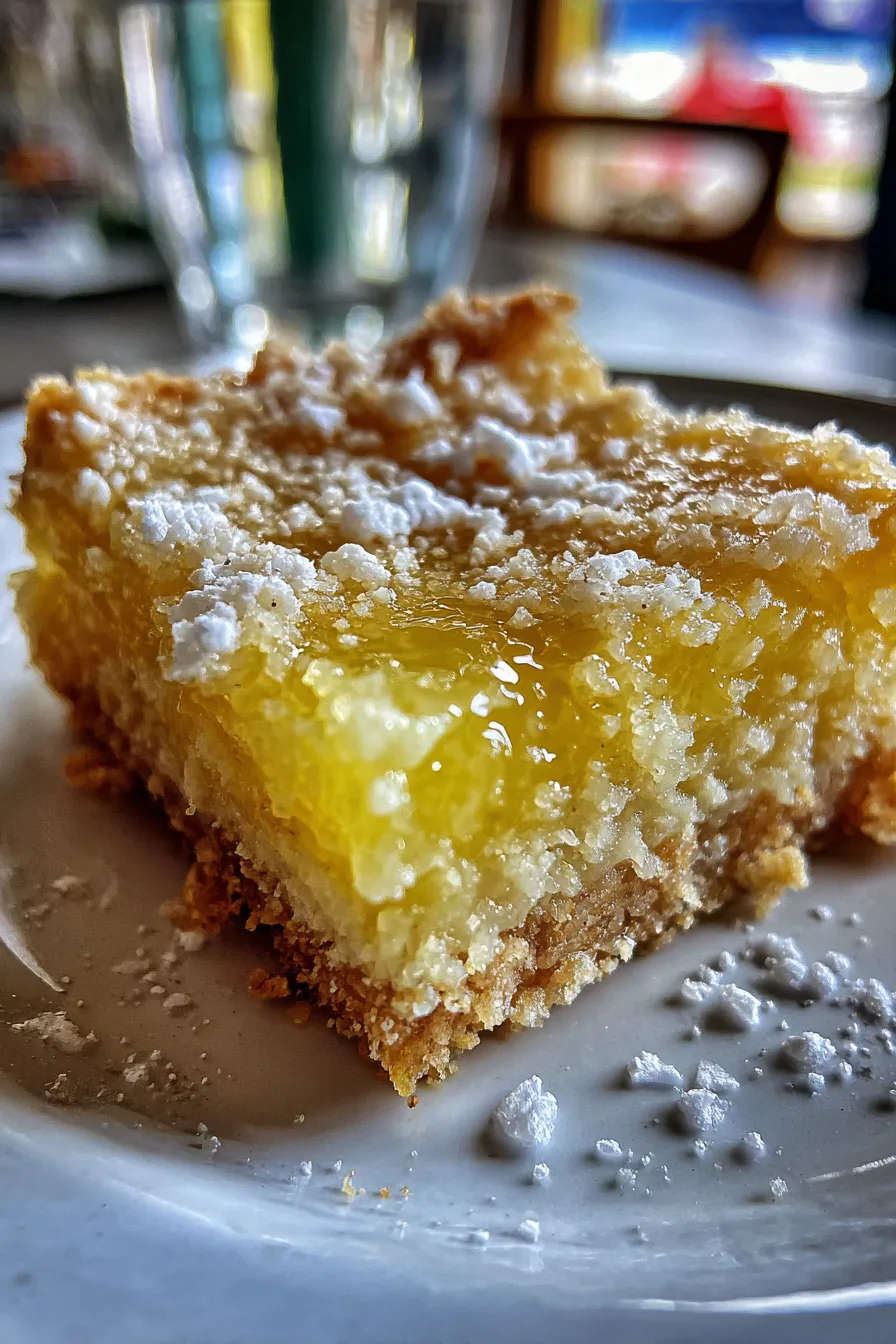
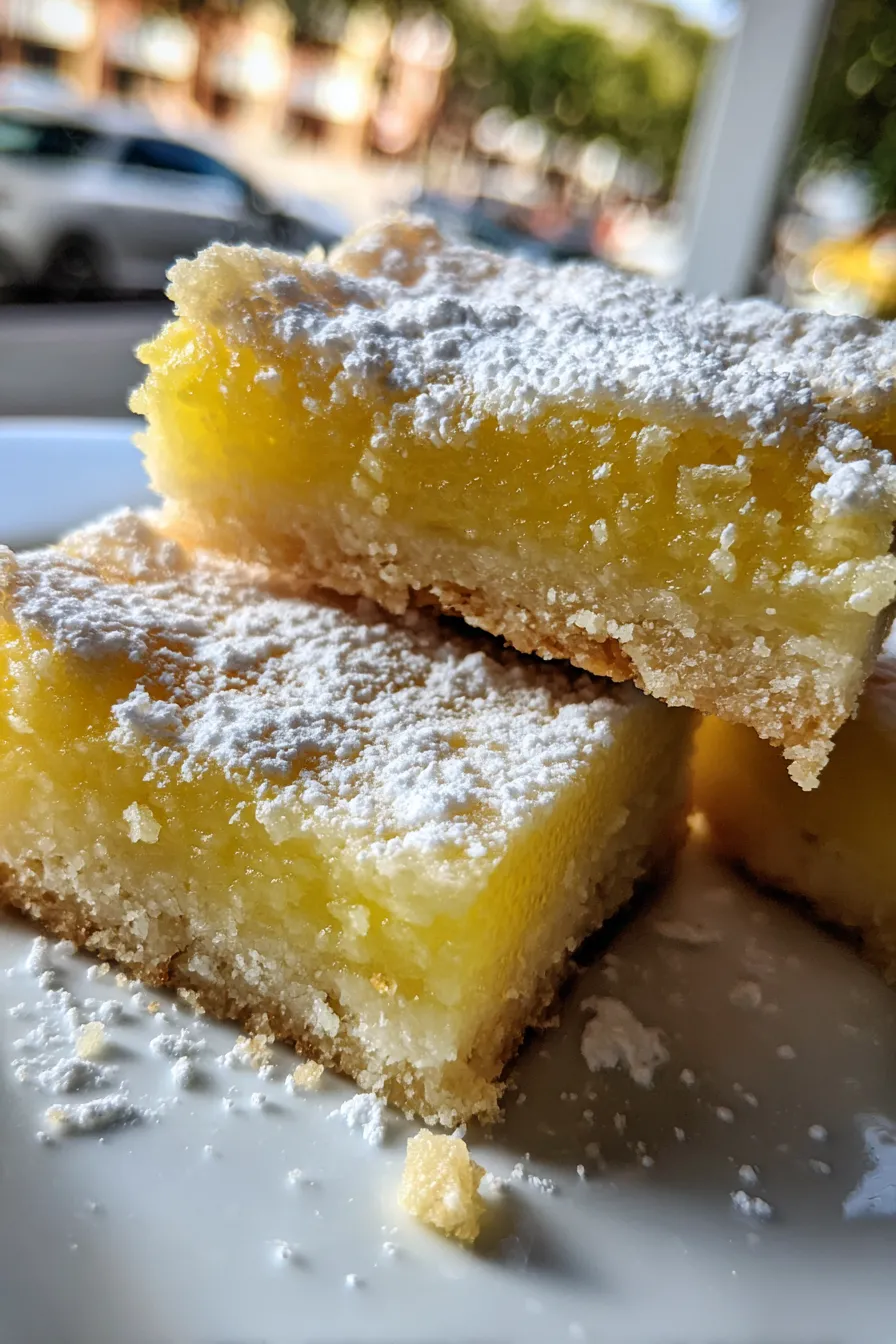
There’s something undeniably cheerful about a tray of lemon bars. These delightful treats, with their bright citrus flavor and perfect balance of sweet and tart, are a favorite for any occasion. Whether you’re planning a summer picnic, a holiday gathering, or simply craving a sweet pick-me-up, these bars are the perfect choice. The contrast between the buttery, crumbly crust and the tangy, creamy filling is what makes them so irresistible. You can find many variations, but the core essence of a great lemon bar remains the same.

I find myself baking lemon bars most often during the spring and summer months when lemons are at their peak. They’re a refreshing alternative to heavier desserts and are always a hit. The simplicity of the recipe is another reason I love them. You don’t need to be a seasoned baker to achieve fantastic results. If you’re looking for a dessert that’s easy to make and guaranteed to impress, you’ve come to the right place. These bars are a guaranteed crowd-pleaser and are always a welcome treat. For more delicious dessert ideas, check out this search on Food Network.
Ingredients You’ll Need
The beauty of lemon bars lies in their simplicity. You’ll likely have most of the ingredients in your pantry already. Here’s what you’ll need to create these sunshine-filled treats.
- For the Crust:
- 1 1/2 cups all-purpose flour
- 1/2 cup powdered sugar
- 1/4 teaspoon salt
- 3/4 cup (1 1/2 sticks) unsalted butter, cold and cubed
- For the Filling:
- 1 1/2 cups granulated sugar
- 1/4 cup all-purpose flour
- 1/4 teaspoon baking powder
- 1/4 teaspoon salt
- 4 large eggs
- 3/4 cup fresh lemon juice (from about 4-5 lemons)
- zest of 1 lemon
- For Garnish (Optional):
- Powdered sugar for dusting
As you can see, the ingredient list is straightforward, making this easy lemon bars recipe accessible to bakers of all levels. The key to the best results is using fresh, high-quality ingredients, especially the lemons. The fresh lemon juice and zest are what give these bars their vibrant flavor. Using fresh lemons will make a huge difference in the overall taste. Freshly squeezed lemon juice is far superior to bottled juice, so be sure to use fresh lemons for the best results.
How to Make Lemon Bars
Let’s dive into the step-by-step process of creating these delicious lemon squares. This recipe is designed to be straightforward and easy to follow. With a little patience, you’ll be enjoying these treats in no time. The process is divided into two main parts: the crust and the filling.
Making the Buttery Crust
The crust is the foundation of any great lemon bar recipe. It should be buttery, crumbly, and slightly sweet. This crust is so good, you might just want to eat it on its own. It’s the perfect contrast to the tangy filling. A good crust is essential for a great lemon bar experience.
First, preheat your oven to 350°F (175°C). In a large bowl, whisk together the flour, powdered sugar, and salt. Add the cold, cubed butter and use a pastry blender or your fingers to cut the butter into the dry ingredients until the mixture resembles coarse crumbs. Alternatively, you can use a food processor to pulse the ingredients together. Press the mixture evenly into the bottom of a 9×13 inch baking pan. Bake for 15-20 minutes, or until the crust is lightly golden. If you are unsure about the butter, you can read more about it here.
Creating the Tangy Lemon Filling
The filling is where the magic happens. It’s the star of the show, providing that zesty, refreshing flavor that we all love. The balance of sweet and tart is crucial, and this recipe nails it. The filling should be smooth, creamy, and packed with lemon flavor. The use of fresh lemon juice and zest is critical for a truly authentic taste.
While the crust is baking, prepare the filling. In a separate bowl, whisk together the granulated sugar, flour, baking powder, and salt. Add the eggs, lemon juice, and lemon zest, and whisk until smooth. Once the crust is out of the oven, pour the filling evenly over the hot crust. Return the pan to the oven and bake for 20-25 minutes, or until the filling is set but still has a slight jiggle in the center. Avoid overbaking, as this can result in a dry filling. If you prefer to have the filling extra smooth, make sure the eggs are at room temperature. You can find some helpful information about how eggs affect desserts here.
Cooling and Cutting the Bars
Patience is key during this stage. Allowing the lemon bars to cool completely before cutting is essential for clean, neat slices. This step is often overlooked, but it makes a huge difference in the final presentation. Resist the urge to cut into the bars while they’re still warm; it will be worth the wait.
Once the bars are baked, let them cool completely in the pan at room temperature. This can take about 2-3 hours. Once cooled, dust the top with powdered sugar. Cut the bars into squares or rectangles using a sharp knife. For clean cuts, wipe your knife clean between each cut. If you prefer, you can use a serrated knife for this purpose. You might also want to read about how to cream butter and sugar here.
Tips for the Best Lemon Bars
Here are some extra tips to help you achieve classic lemon bars every time. These are the little details that can take your baking from good to great. Incorporating these tips will help you bake the best lemon bars you’ve ever tasted.
- Use Fresh Lemons: As mentioned before, fresh lemon juice and zest are crucial for the best flavor.
- Don’t Overbake: Overbaking can result in a dry filling. The filling should still have a slight jiggle in the center when done.
- Cool Completely: Allow the bars to cool completely before cutting for clean slices.
- Sift the Powdered Sugar: Sifting the powdered sugar before dusting the bars will give them a more even coating.
- Chill Before Serving: Chilling the bars for a bit before serving enhances the flavor and texture.
These tips will help ensure your lemon dessert recipes turn out perfectly every time. From the right ingredients to the proper baking techniques, these suggestions will help you produce a dessert that everyone will love.
Variations and Substitutions
Feel free to get creative and customize this lemon bar recipe to your liking. Here are some ideas for variations and substitutions to try:
- Gluten-Free Lemon Bars: Substitute the all-purpose flour in the crust with a gluten-free all-purpose flour blend.
- Lemon Meringue Bars: Top the baked lemon filling with meringue and bake until golden.
- Lemon Curd Bars: Use a store-bought or homemade lemon curd as the filling.
- Lemon Poppy Seed Bars: Add a tablespoon or two of poppy seeds to the crust or filling for extra texture and flavor.
- Vegan Lemon Bars: Use a vegan butter substitute for the crust and a vegan egg replacer for the filling.
These variations open up a world of possibilities, allowing you to tailor the recipe to your preferences or dietary needs. You can easily adapt this base recipe to create something entirely new and exciting. You can find many recipes for gluten-free lemon bars and lemon meringue bars on the internet. And if you’re looking to incorporate a different sweetener, read more about the differences between honey and sugar here.
Serving and Storage
Proper serving and storage are key to enjoying your lemon bars at their best. Here’s how to serve and store these delightful treats to maintain their fresh flavor and texture.
Serve the lemon squares chilled or at room temperature. Dust them with powdered sugar just before serving. These bars are delicious on their own, but you can also pair them with a scoop of vanilla ice cream or a dollop of whipped cream for an extra treat. Store leftover bars in an airtight container in the refrigerator for up to 3-4 days. You can also freeze them for longer storage. Wrap each bar individually in plastic wrap and place them in a freezer-safe bag. They will keep well for up to 2 months. Thaw frozen bars in the refrigerator before serving.
Frequently Asked Questions
Here are some frequently asked questions about making lemon bars from scratch, along with helpful answers:
Can I make the crust ahead of time? Yes, you can make the crust a day or two in advance and store it, unbaked, in the refrigerator. This can save you some time on the day you plan to bake the bars. Bring it to room temperature before baking.
Why did my lemon bar filling crack? Cracking can happen if the filling is overbaked or if the temperature in your oven is too high. Ensure you’re baking at the correct temperature and keep an eye on the bars during the last few minutes of baking. Remember, the filling should still have a slight jiggle in the center when it’s done.
Can I use bottled lemon juice? While fresh lemon juice is always recommended for the best flavor, you can use bottled lemon juice in a pinch. However, the flavor will not be as vibrant. Be sure to use a good quality bottled lemon juice.
How can I prevent the crust from becoming soggy? To prevent a soggy crust, make sure the crust is fully baked before adding the filling. Also, allow the bars to cool completely before cutting. This will give the filling time to set properly.
What can I substitute for the powdered sugar? If you don’t have powdered sugar, you can skip dusting the bars altogether. Alternatively, you can make your own powdered sugar using granulated sugar and a blender or food processor. The consistency might be slightly different, but it will still be delicious. If you want to make a quick search for additional information, try searching Serious Eats.
Making easy lemon bars is a rewarding experience. With this recipe and these tips, you’re well-equipped to create a dessert that will brighten any occasion. Enjoy the process and the delicious results.


3 thoughts on “Lemon Bars Easy Recipe for a Bright and Tangy Treat”