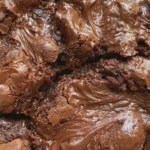
Whip up these delightful spider brownies for a spooky and delicious treat that’s perfect for Halloween parties or anytime you crave a chocolatey delight. These easy spider brownies combine a rich, fudgy base with a fun, decorative spiderweb made from white chocolate or frosting.
Get ready to impress with these charming spider brownies, a fan favorite for any occasion that calls for a touch of festive fun. They offer a delightful balance of deep chocolate flavor and a visually appealing, playful design that kids and adults alike will adore.
What are Spider Brownies?
Spider brownies are a creative twist on classic brownies, typically featuring a rich, chocolatey base adorned with a decorative spiderweb design. This design is often achieved using melted white chocolate, a contrasting frosting, or even a simple piping technique to mimic a spiderweb. They are a popular choice for Halloween party food, adding a fun and spooky element to any gathering.
The magic of these fudgy brownies lies in their versatility; you can customize the brownie base itself to your preference, from a more cake-like texture to intensely rich and dense. The key is the visual appeal of the spiderweb, making them a standout in any dessert spread.
Ingredients You’ll Need
- 1 cup (2 sticks) unsalted butter, melted
- 2 cups granulated sugar
- 4 large eggs
- 1 teaspoon vanilla extract
- 1 cup all-purpose flour
- 1 cup unsweetened cocoa powder (use good quality for best flavor)
- ½ teaspoon baking powder
- ½ teaspoon salt
- 1 cup semi-sweet chocolate chips (optional, for extra chocolatey goodness)
- For the Spiderweb Frosting:
- 1 cup powdered sugar
- 2-3 tablespoons milk or heavy cream
- ½ teaspoon vanilla extract
- OR: 4 oz white chocolate, melted (for a simpler white chocolate spiderweb)
How to Make Spider Brownies
Prepare the Brownie Batter
Begin by preheating your oven to 350°F (175°C) and greasing and flouring a 9×13 inch baking pan. In a large bowl, whisk together the melted butter and granulated sugar until well combined, creating a smooth, glossy base for your brownies. This initial step ensures your brownies will have a wonderfully rich texture.
Next, beat in the eggs one at a time, followed by the vanilla extract, ensuring each addition is fully incorporated before adding the next. This gradual addition helps create a stable batter that bakes evenly, preventing sunken centers and promoting that desirable fudgy texture.
Combine Dry Ingredients
In a separate medium bowl, whisk together the all-purpose flour, unsweetened cocoa powder, baking powder, and salt. Sifting these dry ingredients can help prevent lumps and ensure they are evenly distributed throughout the batter, leading to a smoother final product. This step is crucial for achieving the perfect consistency in your dark chocolate brownies.
Gradually add the dry ingredients to the wet ingredients, mixing on low speed or by hand until just combined. Be careful not to overmix at this stage, as overmixing can develop the gluten in the flour, resulting in tougher brownies. A few streaks of flour remaining are perfectly fine.
Add Chocolate Chips and Bake
If you’re using them, gently fold in the semi-sweet chocolate chips for an extra burst of chocolate flavor and gooey texture. This is also a great time to consider adding other mix-ins like chopped nuts if desired, though classic spider brownies are often kept simple to highlight the topping. This addition makes for truly decadent dessert recipes.
Pour the batter evenly into your prepared baking pan and spread it smooth with a spatula. Bake for 25-30 minutes, or until a toothpick inserted into the center comes out with moist crumbs attached, not wet batter. Overbaking will result in dry brownies, so keep a close eye on them during the last few minutes of baking to achieve that perfect fudgy interior, a hallmark of great brownie recipe.
Cool Completely
Once baked, remove the brownies from the oven and let them cool completely in the pan on a wire rack. This cooling process is absolutely essential before frosting; attempting to frost warm brownies will result in a melted, messy disaster. Patience here is key for a clean, professional-looking finish.
Allowing the brownies to cool thoroughly ensures they set up properly, making them easier to cut and decorate. This step is critical for achieving the clean lines needed for your spider web brownies design.
Prepare the Spiderweb Frosting
While the brownies cool, prepare your spiderweb frosting. In a medium bowl, whisk together the powdered sugar, 2 tablespoons of milk or cream, and vanilla extract until smooth and pourable. Add more liquid, a teaspoon at a time, if needed to reach a consistency that will spread easily but isn’t too thin.
Alternatively, for a quicker and often cleaner look, you can simply melt white chocolate chips in a microwave-safe bowl in 30-second intervals, stirring between each, until smooth. This method provides a slightly firmer, more defined web. If you prefer a no-bake option, consider these simple popcorn bars with M&Ms which are also easy to decorate.
Decorate Your Spider Brownies
Once the brownies are completely cool, spread an even layer of your prepared frosting or melted white chocolate over the top. For the frosting method, load a piping bag fitted with a small round tip (or a zip-top bag with a corner snipped off) with the white frosting. Starting from the center, pipe concentric circles of white frosting across the brownie surface.
Immediately after piping the circles, take a toothpick or a skewer and gently drag it from the center outwards through each circle, creating the spiderweb effect. Repeat this process around the entire surface of the brownies to form the spooky spiderweb frosting. This technique is straightforward and yields impressive results for Halloween brownies.
Chill and Serve
After decorating, place the pan of spider brownies in the refrigerator for at least 30 minutes to allow the frosting or white chocolate to set. This chilling step is crucial for clean slicing and prevents the decorative web from smudging when you cut them into squares. It makes them perfect for kids Halloween treats.
Once set, cut the brownies into squares using a sharp knife, wiping the knife clean between cuts for the neatest edges. Serve these delightful creepy brownies as a festive addition to your Halloween dessert spread, or anytime you want a fun, chocolatey treat.
Tips for Perfect Spider Brownies
- Use Quality Cocoa: The flavor of your brownies hinges on the cocoa powder. Opt for a good quality unsweetened cocoa powder for the richest chocolate taste. Dutch-processed cocoa can offer a darker color and smoother flavor.
- Don’t Overmix: Overmixing the batter after adding flour can lead to tough brownies. Mix only until the ingredients are just combined.
- Cooling is Crucial: Ensure your brownies are completely cool before frosting. This prevents the frosting from melting and ruining the design. For a quicker cool, you can place the pan in the refrigerator for about an hour.
- Frosting Consistency: If using a powdered sugar frosting, aim for a thick but spreadable consistency. Too thin and it will run off; too thick and it will be difficult to spread evenly.
- White Chocolate Shortcut: Melting white chocolate chips is a quick and easy way to create the spiderweb, offering a slightly crispier texture than a buttercream frosting.
- Make-Ahead: You can bake the brownies a day in advance and store them tightly covered at room temperature. Frost and decorate them closer to serving time for the freshest look.
- Storage: Store cooled and decorated spider brownies in an airtight container at room temperature for up to 3 days. If your frosting is very soft or contains dairy that needs refrigeration, store them in the fridge, but let them come to room temperature before serving for best texture.