Create festive and fun ghost rice krispie treats by combining classic cereal treats with a spooky, melted marshmallow coating. These no-bake Halloween desserts are perfect for parties and are simple enough for kids to help make.
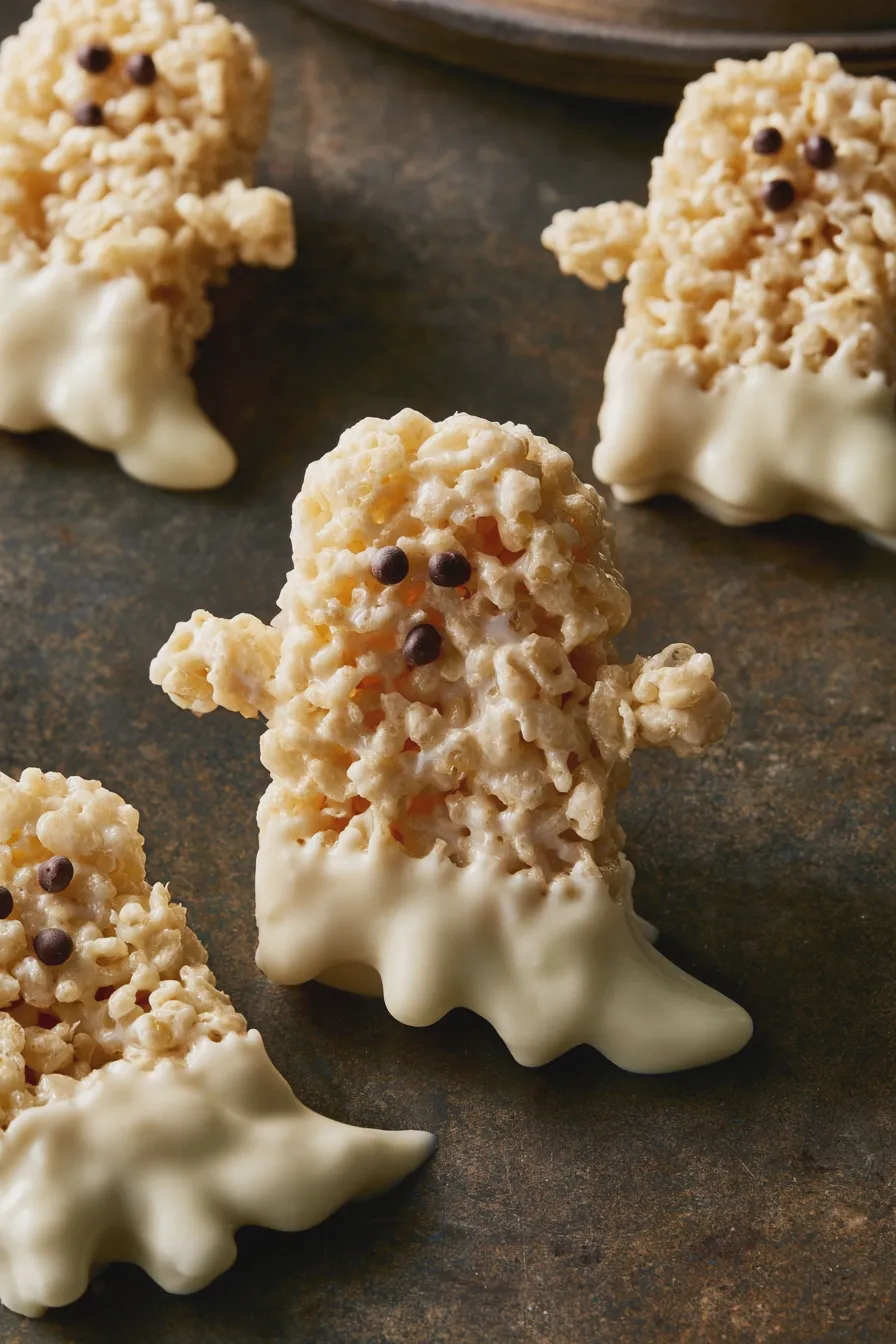
What Are Ghost Rice Krispie Treats?
Ghost Rice Krispie treats are a delightful twist on the classic cereal treat, shaped and decorated to resemble friendly ghosts. They offer that same chewy, gooey texture everyone loves, but with a fun, seasonal presentation that’s perfect for Halloween. You can find more creative Halloween desserts to inspire your spooky baking endeavors.
These treats are a fantastic way to bring a bit of playful spookiness to your dessert table without any complicated baking. They’re incredibly customizable, allowing you to add your own personal touch to each ghostly creation. Making these easy ghost treats is a wonderful activity for the whole family.
Why You’ll Love This Recipe
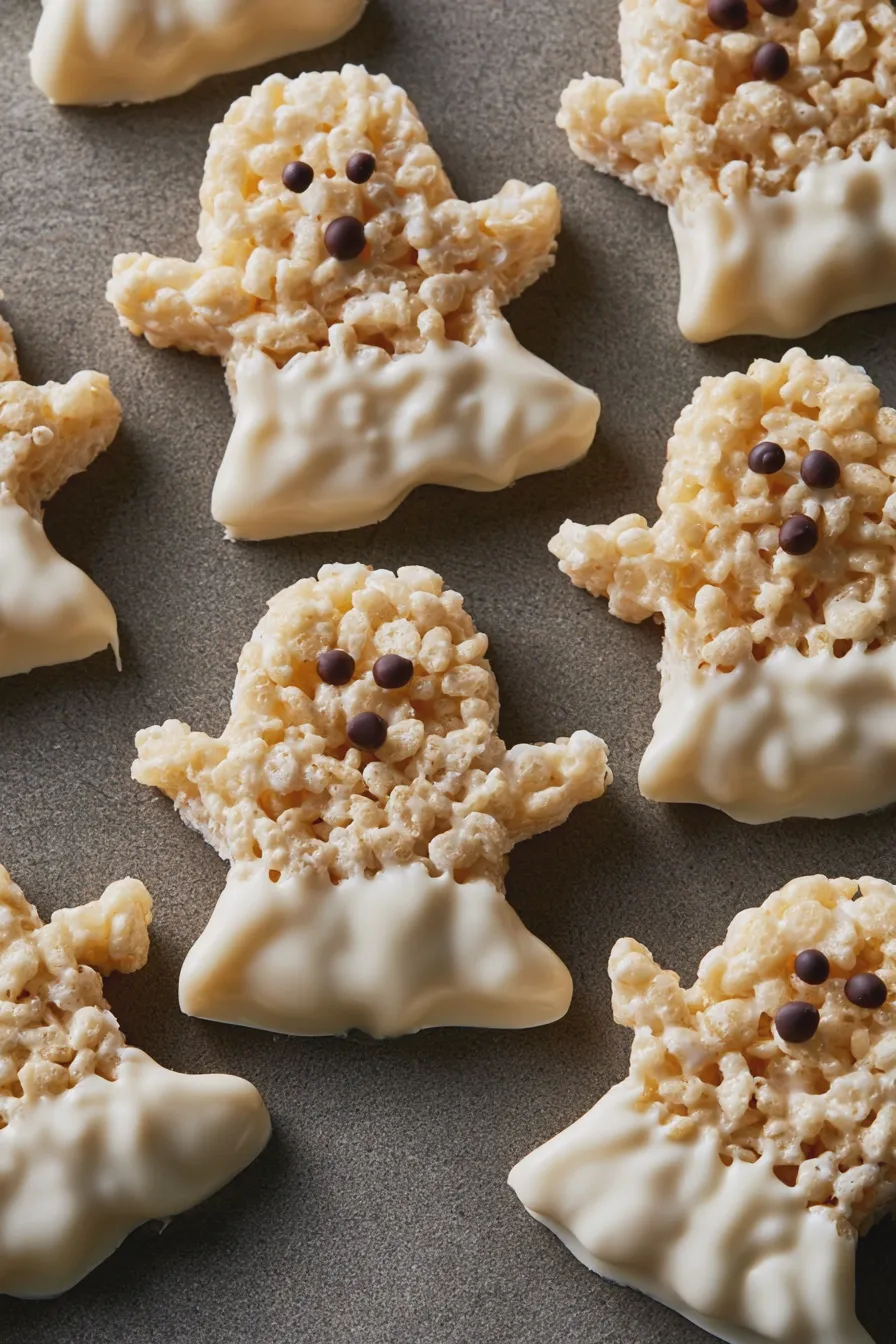
This recipe for ghost rice krispie treats is a guaranteed crowd-pleaser, especially among younger guests. They are incredibly simple to assemble, making them a stress-free addition to any Halloween party spread. The sweet, buttery flavor combined with the satisfying chewiness is simply irresistible.
Beyond their delicious taste and texture, these treats are visually appealing and wonderfully festive. They require no baking, which means less time in a hot kitchen and more time enjoying the spooky season. They’re a perfect example of how simple ingredients can be transformed into fun Halloween desserts.
Ghost Rice Krispie Treats Ingredients
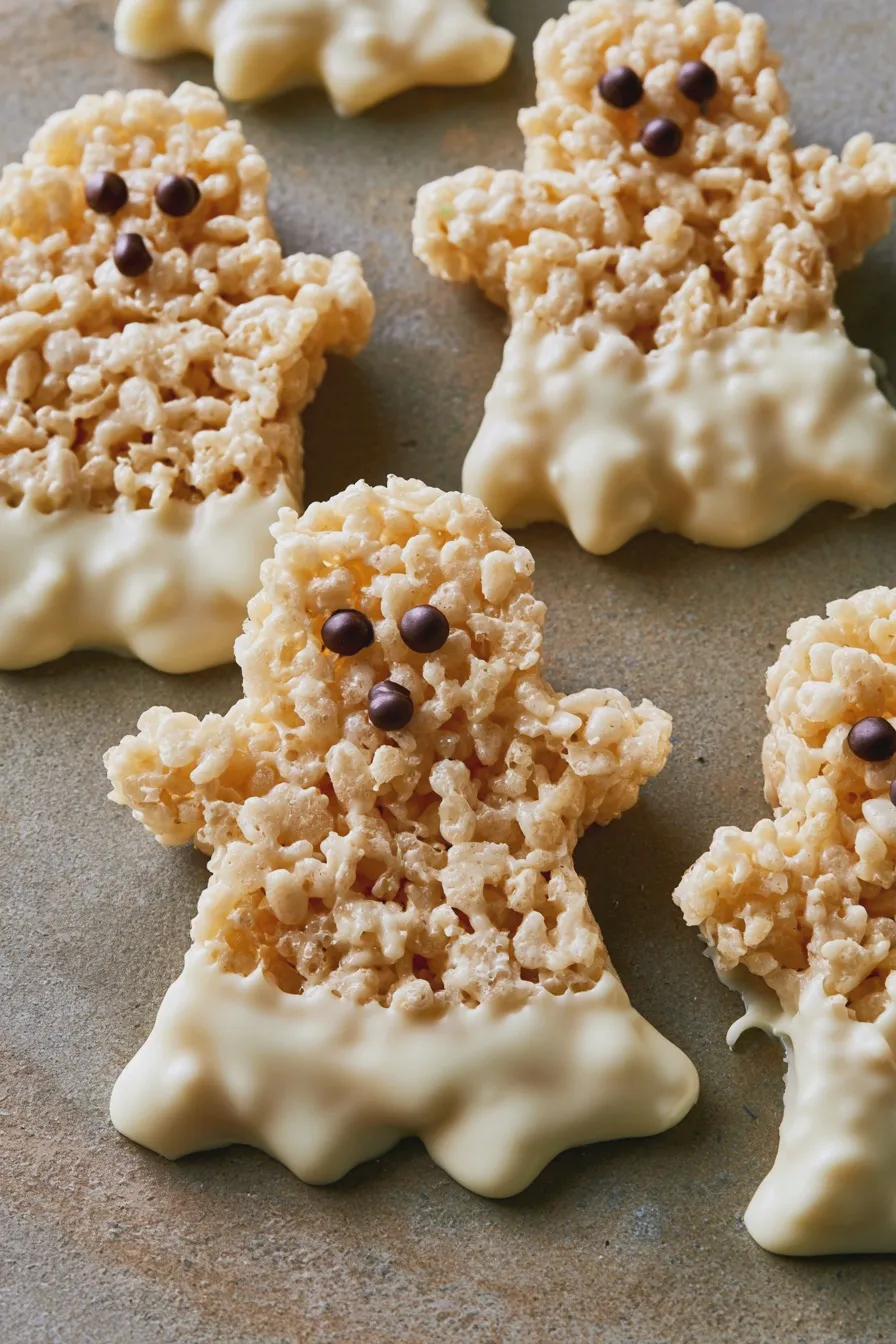
Gathering your ingredients is the first step to creating these adorable haunted rice krispie treats. You’ll need the basics for traditional Rice Krispie treats, plus a few items to give them their ghostly charm.
- 6 cups crispy rice cereal
- 1 (10 ounce) package marshmallows (about 40 large marshmallows)
- 3 tablespoons butter
- 1 teaspoon vanilla extract
- 1 cup white chocolate chips (for decorating eyes)
- Black edible marker or small black candies (for eyes)
Ingredient Notes & Substitutions:
- For a richer flavor, you can use mini marshmallows; you’ll need about 4 cups.
- If you don’t have white chocolate chips, you can use black icing or melted dark chocolate for the ghost eyes.
- For an extra layer of flavor, consider adding a pinch of salt to the marshmallow mixture.
How to Make Ghost Rice Krispie Treats
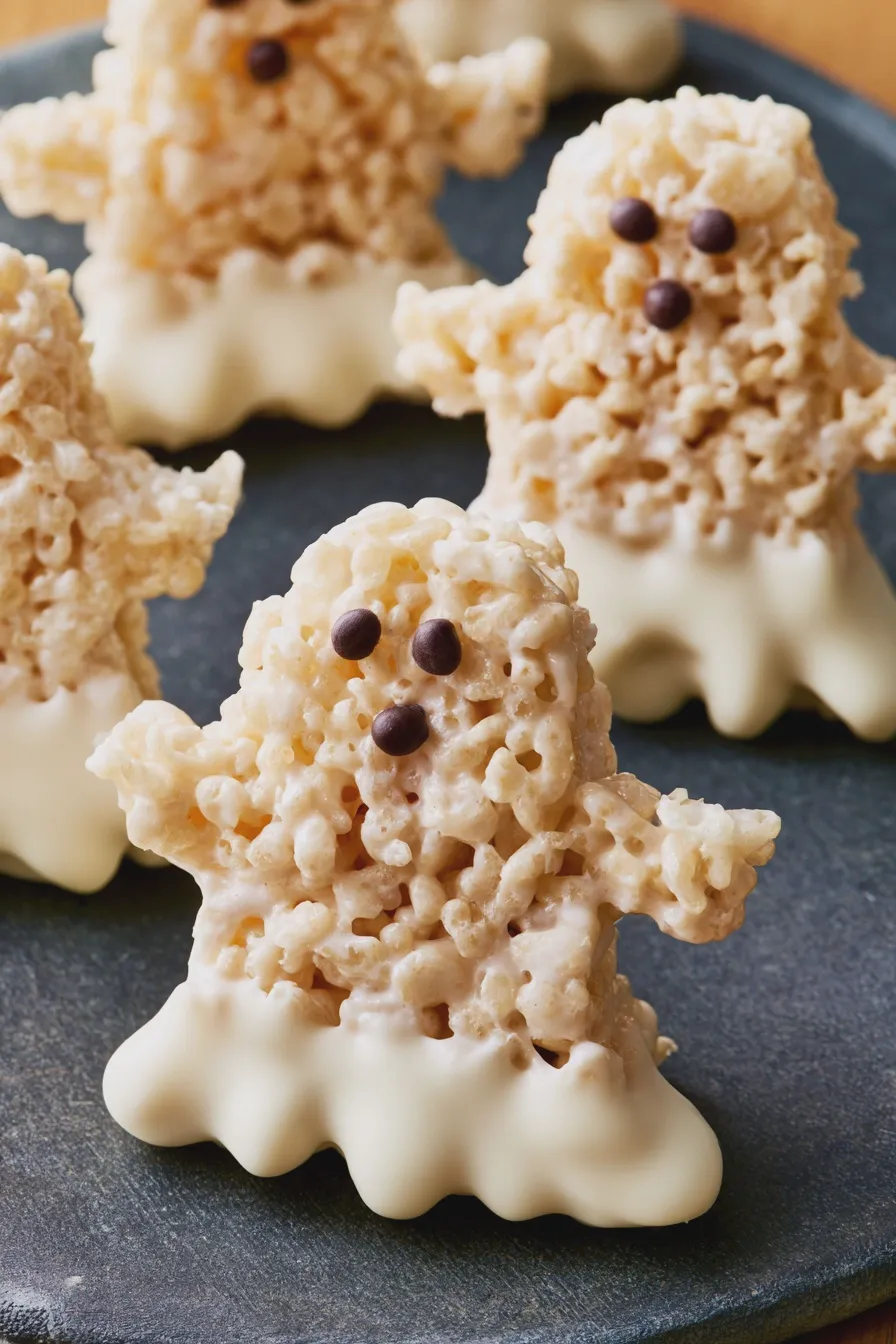
Follow these simple steps to create your own batch of spooky rice krispie treats. This recipe is designed to be straightforward, ensuring delicious results every time.
Step 1: Prepare Your Pan
Lightly grease a 9×13 inch baking pan with butter or cooking spray. This step is crucial to prevent the sticky marshmallow mixture from adhering to the pan, ensuring easy removal later. You can also line the pan with parchment paper, leaving an overhang on the sides for easier lifting.
Step 2: Melt the Marshmallows and Butter
In a large saucepan, melt the butter over low heat. Add the marshmallows and stir constantly until they are completely melted and smooth. This gentle melting process prevents scorching and ensures a consistently gooey texture for your treats.
Step 3: Add Vanilla and Cereal
Remove the saucepan from the heat and stir in the vanilla extract. Gradually add the crispy rice cereal, stirring until it is well coated with the marshmallow mixture. Ensure every piece of cereal is coated for maximum flavor and chewiness.
Step 4: Press Mixture into Pan
Transfer the coated cereal mixture into the prepared baking pan. Using a buttered spatula or your hands (lightly greased or dampened), gently press the mixture evenly into the pan. Avoid pressing too firmly, as this can result in hard, dense treats.
Step 5: Let the Treats Set
Allow the cereal mixture to cool and set in the pan for at least 15-20 minutes. This resting period allows the marshmallows to firm up, making the treats easier to cut and handle. Patience here is key for achieving the perfect texture.
Step 6: Cut and Shape the Ghosts
Once set, invert the entire slab of treats onto a cutting board. Using a ghost-shaped cookie cutter, cut out your ghost shapes. If you don’t have a cookie cutter, you can freehand cut ghost shapes with a knife, or simply cut squares and then shape them by hand.
If you’re not using a cookie cutter, you can gently mold the slightly warm mixture into ghost shapes with lightly greased hands before it fully sets. This is a great way to get creative with your brownie cookies, too, by giving them fun shapes.
Step 7: Decorate the Ghosts
Melt the white chocolate chips according to package directions (usually in the microwave in 30-second intervals, stirring in between). Dip the bottom or side of each ghost treat into the melted white chocolate, letting any excess drip off. Place the decorated ghosts on parchment paper to set.
Step 8: Add the Eyes
Once the white chocolate has set, use a black edible marker or small black candies (like mini chocolate chips or edible googly eyes) to create the eyes on your ghosts. You can place them close together for a cute look or further apart for a slightly spookier appearance. This is where your caramel brownies could get a spooky makeover too!
Tips for Perfect Ghost Rice Krispie Treats
Achieving the perfect texture and appearance for your ghost rice krispie treats involves a few key techniques. Paying attention to these details will elevate your simple cereal treats into something truly special.
Flavor Enhancements
Consider adding a pinch of salt to the marshmallow mixture to balance the sweetness and enhance the overall flavor. A touch of almond extract can also add a subtle, sophisticated note if you’re feeling adventurous. These small additions can make a big difference in the final taste of your vanilla cheesecake cupcakes or other baked goods.
Texture Control
To ensure your treats are chewy and not hard, avoid pressing the mixture too firmly into the pan. Use a light touch when shaping them. Also, make sure your marshmallows are fresh; stale marshmallows can result in a tougher texture.
Make-Ahead and Storage
These spooky rice krispie treats can be made a day or two in advance and stored in an airtight container at room temperature. Once decorated, it’s best to store them in a single layer to prevent sticking, perhaps with parchment paper between layers. They don’t require refrigeration, which makes them perfect for party prep.
Serving Ideas
Arrange these adorable ghost treats on a platter for a festive Halloween party snack. They also pair wonderfully with other Halloween-themed desserts like pumpkin cookies or cheesecake brownies. For a fun presentation, serve them alongside a bowl of candy corn.
Print