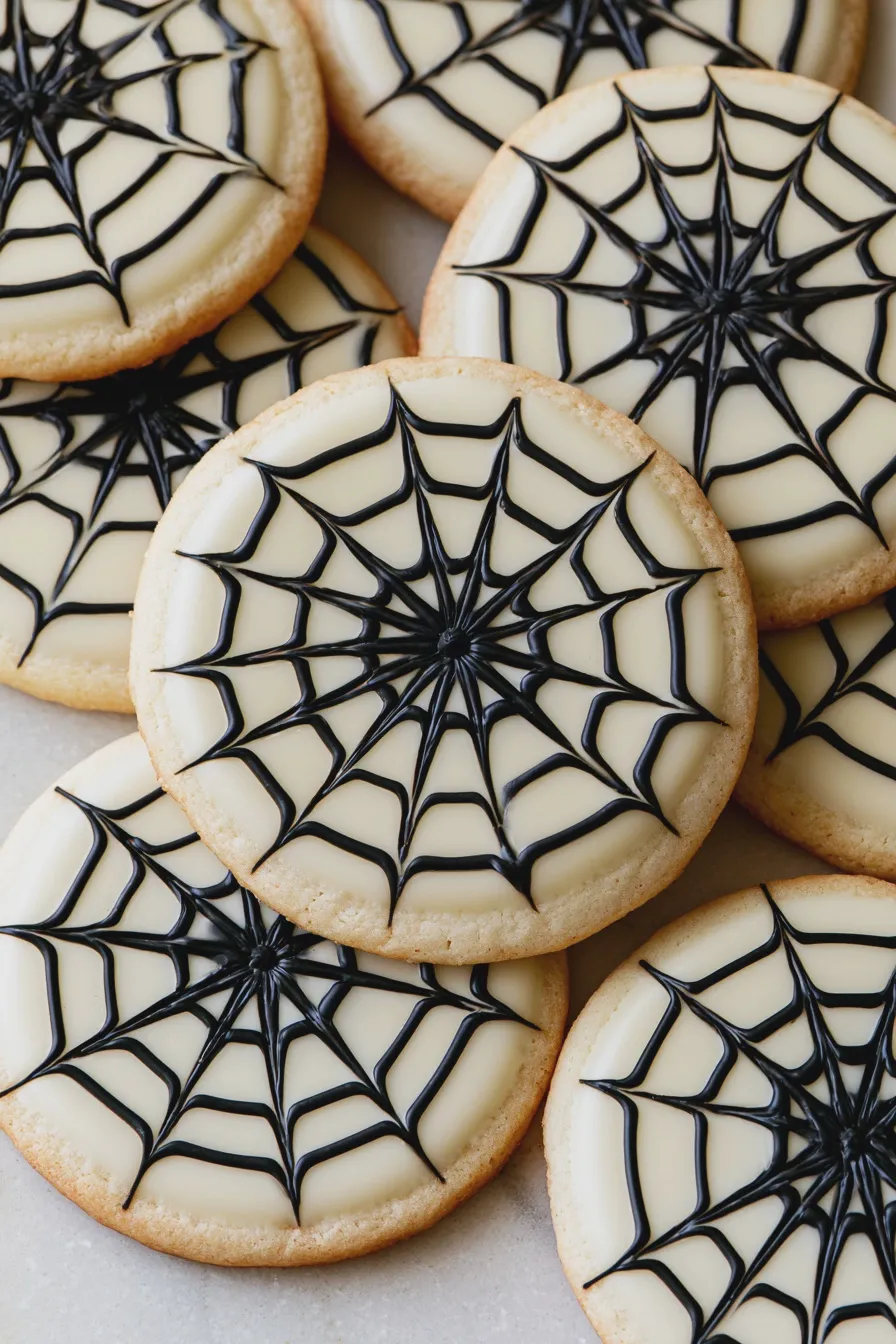
Whip up a batch of these delightful easy Halloween cookies for a fun and festive treat that kids and adults alike will adore. These simple sugar cookies are perfect for decorating with spooky or cute Halloween themes, making them a hit for parties and trick-or-treating.
As the leaves begin to change and a crisp chill fills the air, it’s time to embrace the spooky season with some delicious homemade treats. These easy Halloween cookies are designed to be simple enough for even novice bakers, offering a fantastic way to get into the festive spirit without a lot of fuss. Whether you’re planning a party or just want to surprise your family with some seasonal fun, these cookies are sure to be a hit.
Looking for more festive baking inspiration? Check out these Halloween cookie recipes for even more ideas to fill your treat table.
What Makes These Easy Halloween Cookies So Special?
These aren’t just any cookies; they are the foundation for your most creative and spooky Halloween cookie decorating ideas. The base recipe is a classic, buttery sugar cookie that holds its shape beautifully when baked, making them ideal for using with Halloween cookie cutters. They offer a delightful crispness with a tender crumb, providing the perfect canvas for colorful icing and spooky decorations.
The beauty of this recipe lies in its versatility and simplicity, making it one of the best Halloween cookies for a crowd. You can transform them into adorable ghost cookies, grinning pumpkin cookies, or even creepy witch finger cookies with just a few additions or clever decorating techniques. They are truly the quintessential treat for any autumn celebration or halloween party cookies spread.
Ingredients You’ll Need
- 3 cups all-purpose flour, plus more for dusting
- 1 teaspoon baking powder
- ½ teaspoon salt
- 1 cup (2 sticks) unsalted butter, softened
- 1½ cups granulated sugar
- 2 large eggs
- 1 teaspoon vanilla extract
- 1 teaspoon almond extract (optional, for a richer flavor)
- Royal icing or buttercream frosting for decorating
- Food coloring (orange, black, green, white, etc.)
- Halloween-themed sprinkles and edible decorations
How to Make Easy Halloween Cookies
Step 1: Combine Dry Ingredients
In a medium bowl, whisk together the all-purpose flour, baking powder, and salt until well combined. This ensures even distribution of the leavening agent and salt, which is crucial for consistent cookie texture. Having your dry ingredients pre-mixed helps prevent overmixing the dough later on, leading to tender cookies.
Step 2: Cream Butter and Sugar
In a large bowl, use an electric mixer to cream together the softened unsalted butter and granulated sugar until light and fluffy. This process incorporates air into the mixture, which contributes to the cookies’ texture and helps them spread evenly during baking. Make sure your butter is truly softened, not melted, for the best results.
Step 3: Add Wet Ingredients
Beat in the eggs one at a time, ensuring each is fully incorporated before adding the next. Then, mix in the vanilla extract and almond extract if you are using it. This step builds the base of your cookie dough, adding richness and binding the ingredients together. If your eggs are cold, you can place them in a bowl of warm water for a few minutes to bring them to room temperature.
Step 4: Gradually Add Dry Ingredients to Wet Ingredients
With the mixer on low speed, gradually add the dry ingredient mixture to the wet ingredients. Mix until just combined, being careful not to overmix the dough. Overmixing can develop the gluten in the flour too much, resulting in tough cookies instead of tender ones.
Step 5: Chill the Dough
Divide the dough in half, flatten each half into a disc, and wrap tightly in plastic wrap. Refrigerate for at least 1 hour, or until firm enough to roll out. Chilling the dough is a critical step that prevents the cookies from spreading too much during baking and makes the dough easier to handle. This step is essential for achieving crisp edges on your halloween sugar cookies.
Step 6: Roll and Cut the Dough
Preheat your oven to 350°F (175°C) and line baking sheets with parchment paper. On a lightly floured surface, roll out one disc of chilled dough to about ¼-inch thickness. Use your favorite Halloween cookie cutters to cut out shapes, re-rolling scraps as needed. Consider trying out some fun halloween cookie decorating ideas as you cut.
Step 7: Bake the Cookies
Carefully transfer the cut-out cookies to the prepared baking sheets, leaving about 1 inch between them. Bake for 8-10 minutes, or until the edges are lightly golden brown. Be watchful, as baking times can vary depending on the size and thickness of your cookies; you want them cooked through but not browned.
Step 8: Cool the Cookies
Let the cookies cool on the baking sheets for a few minutes before transferring them to a wire rack to cool completely. Ensuring the cookies are fully cooled is essential before decorating; otherwise, the frosting will melt right off. This cooling period also allows the cookies to firm up further, achieving that perfect crisp texture.
Step 9: Decorate Your Spooky Creations
Once completely cool, it’s time for the fun part: decorating! Prepare your royal icing or buttercream frosting, tint it with food coloring, and get creative with your spooky cookies. Use piping bags with various tips for details, or simply spread frosting with an offset spatula. Don’t forget to add sprinkles and edible decorations to complete the festive look, turning them into perfect festive halloween cookies.
Tips for Perfect Halloween Cookies Every Time
Achieving perfectly shaped and delicious Halloween cookies is all about a few key techniques. Ensure your ingredients are at the right temperature—softened butter and room-temperature eggs are crucial for proper dough consistency. If your dough becomes too soft while rolling, don’t hesitate to pop it back into the refrigerator for 10-15 minutes to firm it up again, which is especially helpful for intricate cuts.
When it comes to decorating, the type of frosting you use makes a difference. Royal icing dries hard, making it ideal for intricate designs and stacking, while buttercream offers a softer, richer flavor and is easier to spread for a smooth finish. For exceptionally detailed decorations or if you’re aiming for incredibly smooth surfaces, you might find inspiration in learning about techniques for achieving a perfect finish, much like one might explore for other baked goods.
If you’re short on time or want a simpler decorating approach, consider using pre-made cookie icing or even just a dusting of powdered sugar for a frosted look. For those who prefer no-bake options, exploring no bake halloween cookies can be a great alternative, though these baked sugar cookies offer a satisfying crunch.
Flavor and Texture Variations
While the classic vanilla sugar cookie is a crowd-pleaser, you can easily adapt this recipe to explore other delicious flavor profiles perfect for fall. Adding a touch of cinnamon or pumpkin spice to the dough can transform these into delightful fall cookies. For a richer, more decadent cookie, consider incorporating finely ground almond flour, similar to how it’s used in almond flour brownies, for a slightly different crumb and nutty undertone.
You can also play with the extracts; a hint of orange zest can add a bright citrus note that pairs wonderfully with Halloween themes, or a touch of peppermint can give a festive twist. If you’re looking for a cookie with a distinct flavor, perhaps a twist on a classic, you might enjoy exploring options like peanut butter brownies for a different kind of treat, though these sugar cookies remain a top choice for their decorating potential.
Storage and Make-Ahead Tips
These cookies are fantastic for making ahead, which is a lifesaver during the busy holiday season. Once completely cooled, store undecorated cookies in an airtight container at room temperature for up to 3-4 days. For longer storage, you can freeze undecorated cookies in a single layer on a baking sheet until firm, then transfer them to a freezer-safe bag or container for up to 3 months; they thaw beautifully at room temperature.
Decorated cookies can also be stored, but it’s best to ensure the frosting is completely dry before stacking them. Layer parchment paper between decorated cookies to prevent sticking and store them in an airtight container at room temperature for up to 2-3 days. Be aware that humidity can affect the texture of decorated cookies, so airtight storage is key for maintaining their crispness and the integrity of the frosting.
Print