
Black velvet cupcakes offer a dramatic, deeply chocolatey twist on a classic, perfect for holidays or any special occasion. These rich, moist treats feature a stunning dark hue and a tender crumb that pairs beautifully with cream cheese frosting.
For a truly show-stopping dessert, look no further than these black velvet cupcakes. They deliver an intense chocolate flavor with a surprisingly tender crumb, making them a sophisticated alternative to traditional red velvet cake. Imagine a deep, dark hue that hints at the decadent experience to come, finished with a swirl of creamy frosting for the ultimate indulgence.
What are Black Velvet Cupcakes?
Black velvet cupcakes are a visually striking dessert that takes inspiration from the beloved red velvet cake, but with a darker, more intense chocolate profile. The signature black color comes from black cocoa powder, which imparts a deeper flavor and a more profound shade than regular unsweetened cocoa. These cupcakes are celebrated for their moist texture and rich, dark chocolate taste, making them a favorite for those who adore deep chocolate flavors. You can find more information on the history and variations of velvet cakes on Wikipedia.
Unlike their red counterparts, which often rely on red food coloring for their vibrant hue, black velvet cupcakes achieve their dramatic appearance naturally through the use of black cocoa. This special ingredient is key to both the color and the profoundly rich chocolate flavor that sets these cakes apart. They are a fantastic choice for anyone looking for a dramatic and delicious homemade treat.
Black Velvet Cupcake Ingredients
Crafting these decadent black velvet cupcakes requires a few key ingredients that contribute to their unique color and flavor. The star of the show is undoubtedly black cocoa powder, which provides that signature deep hue and intense chocolate taste. Beyond that, you’ll find familiar baking staples that ensure a moist and tender crumb.
- 2 ¼ cups all-purpose flour
- 1 ½ cups granulated sugar (you can use a mix of granulated and brown sugar for added moisture; see notes on brown sugar vs. white sugar)
- ¾ cup black cocoa powder (essential for color and deep flavor)
- 1 ½ teaspoons baking soda
- ¾ teaspoon baking powder
- ¾ teaspoon salt
- 2 large eggs, room temperature
- 1 cup buttermilk, room temperature
- ¾ cup vegetable oil (or other neutral oil like canola)
- 1 teaspoon vanilla extract
- ¾ cup hot water or hot brewed coffee (coffee enhances chocolate flavor)
For those with dietary restrictions, exploring options like gluten-free baking can be a rewarding adventure, and many recipes can be adapted. While this specific black velvet cupcake recipe isn’t inherently vegan, with a few substitutions (like flax eggs and dairy-free buttermilk), you could achieve delicious vegan black velvet cupcakes.
How to Make Black Velvet Cupcakes
Creating these stunning black velvet cupcakes is a straightforward process that yields impressive results. By following these steps carefully, you’ll achieve perfectly moist and deeply chocolatey treats every time. Remember that room temperature ingredients incorporate more smoothly, leading to a better batter consistency.
Step 1: Prepare Your Baking Pans and Oven
Preheat your oven to 350°F (175°C) and line standard muffin tins with black or dark-colored cupcake liners. This preparation ensures that your cupcakes bake evenly and release easily after cooling.
Step 2: Combine Dry Ingredients
In a large mixing bowl, whisk together the all-purpose flour, granulated sugar, black cocoa powder, baking soda, baking powder, and salt. Whisking thoroughly ensures that all leavening agents and salt are evenly distributed, preventing pockets of saltiness or uneven rising in your cupcakes.
Step 3: Combine Wet Ingredients
In a separate medium bowl, whisk together the room temperature eggs, buttermilk, vegetable oil, and vanilla extract until well combined. Using room temperature ingredients helps emulsify the batter, leading to a smoother, more consistent texture in the finished cupcakes.
Step 4: Mix Wet and Dry Ingredients
Pour the wet ingredients into the bowl with the dry ingredients and mix on low speed with an electric mixer (or by hand with a whisk) until just combined. Be careful not to overmix at this stage, as it can develop the gluten too much, resulting in tougher cupcakes.
Step 5: Incorporate Hot Liquid
Gradually add the hot water or hot brewed coffee to the batter while mixing on low speed. The batter will be thin, which is exactly what you want for incredibly moist cupcakes. The hot liquid blooms the cocoa powder, intensifying the chocolate flavor.
Step 6: Fill Cupcake Liners
Divide the batter evenly among the prepared cupcake liners, filling each about two-thirds full. This allows room for the cupcakes to rise without overflowing during baking, ensuring a beautiful domed top.
Step 7: Bake the Cupcakes
Bake for 18-22 minutes, or until a wooden skewer or toothpick inserted into the center of a cupcake comes out clean. Overbaking can lead to dry cupcakes, so start checking for doneness a couple of minutes before the minimum bake time.
Step 8: Cool the Cupcakes
Let the cupcakes cool in the muffin tins for about 10-15 minutes before transferring them to a wire rack to cool completely. Allowing them to cool slightly in the tin prevents them from breaking when you remove them, and complete cooling on a rack is crucial before frosting.
Black Velvet Cupcake Frosting
While many frostings pair well with these rich chocolate cupcakes, a classic cream cheese frosting is the traditional and arguably best choice. Its tangy sweetness cuts through the deep chocolate flavor beautifully, creating a balanced and utterly delicious combination. For those who love a good cream cheese frosting, you might also enjoy this technique for chocolate lava cake which often features a similar creamy element.
Here’s a simple recipe for a luscious cream cheese frosting that complements the black velvet cupcakes perfectly:
- 8 ounces cream cheese, softened
- ½ cup unsalted butter, softened
- 4 cups powdered sugar, sifted
- 1 teaspoon vanilla extract
- 2-4 tablespoons milk or heavy cream (to reach desired consistency)
Beat the softened cream cheese and butter together until smooth and creamy. Gradually add the sifted powdered sugar, mixing on low speed until incorporated, then increase speed and beat until light and fluffy. Stir in the vanilla extract and add milk or cream one tablespoon at a time until the frosting reaches your desired spreading or piping consistency. This frosting offers a delightful contrast to the intense chocolate of the cupcakes, making for a truly memorable dessert.
Tips for the Best Black Velvet Cupcakes
Achieving the perfect black velvet cupcake is all about paying attention to a few key details. From ingredient temperature to mixing techniques, these tips will help you bake the best black velvet cupcakes possible, ensuring a moist crumb and deep chocolate flavor.
- Use Quality Black Cocoa: The quality of your black cocoa powder significantly impacts the color and flavor. Look for brands known for their deep, dark hue and rich chocolate taste. This is the secret to truly spectacular black velvet cupcakes.
- Room Temperature Ingredients are Key: Ensure your eggs, buttermilk, and butter (for frosting) are at room temperature. This allows them to emulsify properly, creating a smoother batter and a lighter texture.
- Don’t Overmix: Overmixing the batter can lead to tough, dense cupcakes. Mix the wet and dry ingredients until just combined, and be gentle when incorporating the hot liquid.
- Hot Liquid for Flavor: Using hot water or coffee is crucial. It “blooms” the cocoa powder, intensifying its flavor and contributing to the moistness of the cake. Coffee, in particular, enhances the chocolate notes without making the cupcakes taste like coffee.
- Accurate Measuring: Measure your flour and cocoa powder correctly. Spoon the flour into your measuring cup and level it off with a straight edge, rather than scooping directly from the bag, which can lead to too much flour.
- Cool Completely Before Frosting: Resist the urge to frost warm cupcakes! They need to be completely cool to prevent the frosting from melting and sliding off. This ensures a beautiful finish for your homemade black velvet cupcakes.
For those who enjoy experimenting with flavors, consider adding a touch of espresso powder to the batter to deepen the chocolate notes further, or a tiny pinch of cayenne pepper for a subtle kick. If you’re looking for other chocolate delights, perhaps a batch of raspberry brownies or some delicate lemon poppy seed cookies might be next on your baking list.
Black Velvet Cupcake Decorating Ideas
Once your black velvet cupcakes are baked and cooled, the fun of decorating begins! The dark, dramatic color of these cupcakes provides a perfect canvas for a variety of creative and elegant decorating ideas. Consider the contrast between the deep black cake and lighter frostings for a stunning visual impact.
- Classic Cream Cheese Swirl: Pipe or spread the cream cheese frosting generously on top of each cooled cupcake, creating elegant swirls. You can use a piping bag with a star tip for a professional look, or simply a spatula for a more rustic appeal.
- White Chocolate Drizzle: Melt some white chocolate and drizzle it over the frosted cupcakes. This adds a beautiful contrast and an extra layer of sweetness.
- Edible Glitter or Dust: For a touch of magic, lightly dust the frosted cupcakes with edible glitter or shimmer dust. Gold or silver tones work particularly well against the dark cake.
- Fresh Berries: Top each cupcake with a fresh raspberry or a small cluster of blueberries. The vibrant colors of the berries pop against the black cake and white frosting.
- Chocolate Shavings: Use a vegetable peeler to create chocolate shavings from a bar of dark or white chocolate and sprinkle them over the frosting.
- Themed Decorations: For holidays like Halloween or a “Goth” themed party, consider adding small edible skulls, spiders, or even a touch of edible gold leaf for an extra dramatic flair. Black velvet cake decorating ideas are endless!
Remember, the goal is to enhance the beauty of the black velvet cupcakes without overpowering their rich chocolate flavor. A simple yet elegant decoration often speaks volumes.
Print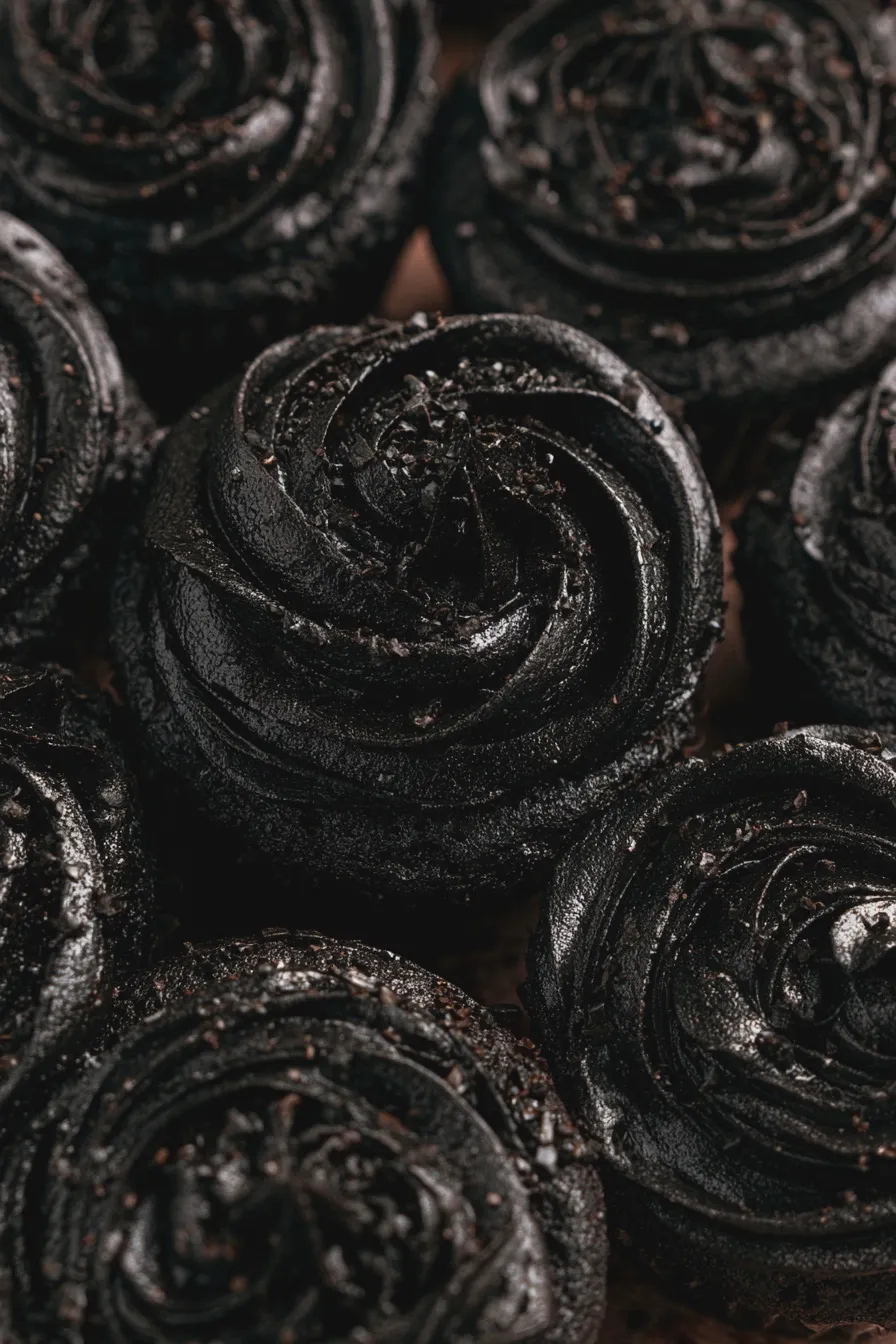
black velvet cupcakes Recipe
Description
Indulge in the dramatic elegance of Black Velvet Cupcakes. These intensely dark, moist, and tender cupcakes are a showstopper, featuring a rich cocoa flavor and a hint of coffee, all topped with a luscious cream cheese frosting. Perfect for Halloween, birthdays, or any occasion that calls for a touch of gothic charm.
Ingredients
- 1 ½ cups all-purpose flour
- 1 ½ cups granulated sugar
- ¾ cup unsweetened cocoa powder (Dutch-processed recommended for darker color)
- 1 ½ teaspoons baking soda
- ¾ teaspoon baking powder
- ¾ teaspoon salt
- 2 large eggs, at room temperature
- ¾ cup buttermilk, at room temperature
- ¾ cup vegetable oil
- 1 teaspoon vanilla extract
- ¾ cup hot brewed coffee (or hot water)
- For the Cream Cheese Frosting:
- 8 ounces cream cheese, softened
- ½ cup (1 stick) unsalted butter, softened
- 4 cups powdered sugar, sifted
- 1 teaspoon vanilla extract
- 1–2 tablespoons milk (optional, for consistency)
- Black food coloring (gel recommended)
Instructions
- Preheat & Prep: Preheat oven to 350°F (175°C). Line a 12-cup muffin tin with cupcake liners.
- Dry Ingredients: In a large bowl, whisk together the flour, granulated sugar, cocoa powder, baking soda, baking powder, and salt until well combined.
- Wet Ingredients: In a separate medium bowl, whisk together the eggs, buttermilk, vegetable oil, and vanilla extract.
- Combine: Pour the wet ingredients into the dry ingredients and mix on low speed (or with a whisk) until just combined. Do not overmix.
- Add Hot Liquid: Gradually add the hot brewed coffee (or hot water) to the batter while mixing on low speed until smooth. The batter will be thin.
- Fill Liners: Divide the batter evenly among the prepared cupcake liners, filling each about two-thirds full.
- Bake: Bake for 20-22 minutes, or until a wooden skewer inserted into the center of a cupcake comes out clean.
- Cool: Let the cupcakes cool in the muffin tin for 5-10 minutes before transferring them to a wire rack to cool completely.
- Make Frosting: While the cupcakes cool, prepare the frosting. In a large bowl, beat the softened cream cheese and butter with an electric mixer until smooth and creamy.
- Add Sugar and Vanilla: Gradually add the sifted powdered sugar, one cup at a time, beating until well combined. Mix in the vanilla extract.
- Color Frosting: Add black food coloring a little at a time until you achieve your desired deep black color. If the frosting is too thick, add milk, one tablespoon at a time, until it reaches a spreadable consistency.
- Frost Cupcakes: Once the cupcakes are completely cool, frost them generously using an offset spatula or a piping bag.
Notes
- For an even richer flavor and darker color, use Dutch-processed cocoa powder.
- Ensure all wet ingredients for the cake batter (eggs, buttermilk) are at room temperature for best results.
- Don’t overmix the batter once the wet and dry ingredients are combined to ensure tender cupcakes.
- Using gel food coloring will give you a more intense black color without thinning out the frosting.
- Store frosted cupcakes in an airtight container in the refrigerator for up to 3 days. Bring to room temperature before serving for the best texture.
Nutrition
- Calories: Approximately 250-300 (without frosting)
- Sugar: Approximately 30-35g (without frosting)
- Sodium: Approximately 150-200mg (without frosting)
- Fat: Approximately 12-15g (without frosting)
- Carbohydrates: Approximately 40-45g (without frosting)
- Protein: Approximately 3-4g (without frosting)







