
This festive candy corn bark is a delightful no-bake treat, perfect for sharing during Halloween or any fall celebration. Its sweet, crunchy texture and classic candy corn flavor make it an incredibly easy and crowd-pleasing confection.
As autumn leaves begin to fall and the air turns crisp, our thoughts naturally turn to cozy baking projects and fun holiday treats. This delightful candy corn bark recipe is a fantastic way to get into the spirit without spending hours in the kitchen. It’s a simple yet visually appealing dessert that’s sure to be a hit with both kids and adults alike.
What is Candy Corn Bark?
Candy corn bark is a wonderfully simple confection that transforms classic candy corn into a delightful treat. It typically involves melting white chocolate or another base chocolate, spreading it thin, and then topping it with colorful candy corn and sometimes other festive additions like sprinkles or nuts. The result is a sweet, crunchy, and visually striking candy that’s perfect for sharing or enjoying as a personal indulgence during the fall season. You can find many variations, but the core idea is a chocolate base adorned with the iconic tri-colored kernels, making it a quintessential halloween candy.
Ingredients for Easy Candy Corn Bark
- 12 ounces good quality white chocolate chips (or chopped white chocolate bar)
- 1 cup candy corn
- Optional: 1/4 cup festive sprinkles, chopped nuts (like peanuts or pecans), or pretzels
Using good quality white chocolate is key to achieving a smooth, creamy melt and a pleasant flavor. If you prefer a darker chocolate base, you can certainly substitute milk or dark chocolate chips, though the vibrant colors of the candy corn will pop more against a white background. For those who enjoy a little extra crunch, adding chopped nuts like pecans or peanuts can be a delicious addition, creating a delightful peanut butter candy corn bark variation. If you’re looking for other festive treats, consider exploring our recipes for protein brownies or strawberry lemonade cookies for different flavor profiles.
Equipment You’ll Need
- Baking sheet
- Parchment paper or wax paper
- Microwave-safe bowl or double boiler
- Spatula or offset spatula
- Sharp knife or pizza cutter (for breaking up the bark)
Having the right tools makes the process of making this candy corn bark recipe easy. Parchment paper is essential for preventing sticking and making cleanup a breeze. A good spatula will help you spread the melted chocolate evenly, which is crucial for consistent thickness and texture in your finished bark. If you don’t have a microwave-safe bowl, a double boiler setup works perfectly for melting chocolate gently.
How to Make Candy Corn Bark
Prepare Your Baking Sheet
Line a baking sheet with parchment paper or wax paper, ensuring it covers the entire surface. This step is crucial to prevent the melted chocolate from sticking, making it easy to remove the finished bark. Having your sheet ready beforehand ensures you can quickly pour and spread the chocolate while it’s still warm and pliable.
Melt the White Chocolate
Place the white chocolate chips in a microwave-safe bowl. Microwave on 50% power for 30-second intervals, stirring well after each interval, until the chocolate is almost completely melted. Stir until smooth; residual heat will melt any remaining pieces. If you prefer, you can melt the chocolate gently in a double boiler over simmering water, stirring constantly until smooth.
Be patient when melting white chocolate, as it can scorch easily if the heat is too high or if microwaved for too long without stirring. Overheating can result in a grainy texture or a burnt flavor, so it’s always better to melt it slowly and gently. If your chocolate seems too thick, you can add a teaspoon of coconut oil or vegetable shortening to help thin it out, but this is often unnecessary if you use good quality chips.
Spread the Chocolate Base
Pour the melted white chocolate onto the prepared baking sheet. Using a spatula or offset spatula, spread the chocolate into a thin, even layer, about 1/4 inch thick. Aim for a roughly rectangular shape to make breaking it into pieces easier later on. An even layer ensures consistent texture and makes it easier to achieve neat pieces of bark.
For a perfectly smooth finish, you can lightly tap the baking sheet on the counter a few times to help level the chocolate and release any air bubbles. Don’t worry if your spread isn’t perfectly uniform; the rustic charm is part of what makes this chocolate bark so appealing. If you find spreading tricky, warming your spatula slightly can help it glide more smoothly.
Add the Toppings
While the chocolate is still wet, immediately sprinkle the candy corn evenly over the surface. If you are using any optional additions like sprinkles or chopped nuts, scatter them over the chocolate now as well. Press down gently on the toppings with your hand or the back of the spatula to ensure they adhere well to the melted chocolate.
Distributing the candy corn evenly is key to getting that iconic look and flavor in every bite. You can arrange them in rows, patterns, or just scatter them randomly – either way, it will look festive! If you’re adding nuts, consider lightly toasting them beforehand to enhance their flavor and crunch, a technique often used in recipes like almond flour brownies for added depth.
Chill and Harden
Place the baking sheet in the refrigerator for at least 30-60 minutes, or until the chocolate is completely firm and set. You can also leave it at room temperature if your kitchen is cool, but refrigeration speeds up the process significantly. The bark is ready when it’s hard to the touch and snaps cleanly.
Avoid the freezer, as it can cause condensation to form on the chocolate, potentially affecting its texture and appearance. Once the bark is fully hardened, it will be easy to lift off the parchment paper. This step is crucial for achieving that satisfying brittle snap when you break the bark into pieces.
Break into Pieces
Once the bark is completely hardened, carefully lift it off the parchment paper. Place it on a cutting board and use a sharp knife or a pizza cutter to break it into irregular pieces. You can also gently tap the sheet with your hands to create natural breaks. The irregular shapes add to the charm of this homemade candy corn candy recipe.
If the chocolate is very hard, you might need to apply a little pressure. For cleaner breaks, ensure the chocolate is thoroughly chilled. If you find it difficult to cut, let it sit at room temperature for a few minutes to soften slightly before attempting to break it. This is the final step that transforms the sheet into easy-to-share servings.
Tips for the Best Candy Corn Bark
Achieving the perfect candy corn bark is all about attention to detail and using quality ingredients. Start with good quality white chocolate, as cheaper brands can be difficult to melt smoothly and may have an artificial taste. When melting, use low heat and stir frequently to prevent scorching, which is a common pitfall with white chocolate. For a truly festive look, ensure your candy corn is fresh and vibrant, as older candy corn can sometimes lose its color intensity.
Consider adding a touch of flavor extract, like a drop of vanilla or even a hint of peppermint, to the melted chocolate for an extra dimension of taste. If you’re making this for a special event, think about color coordination with sprinkles or adding edible glitter for extra sparkle. This chocolate bark is incredibly versatile, so don’t be afraid to experiment with your favorite additions, perhaps even a swirl of melted milk chocolate or dark chocolate for a marbled effect, similar to how we might layer ingredients in marshmallow brownies.
Storage and Serving Suggestions
Store your finished candy corn bark in an airtight container at room temperature in a cool, dry place. If your kitchen is particularly warm, it’s best to store it in the refrigerator to prevent the chocolate from melting. Properly stored, this chocolate treat will stay fresh for up to two weeks, though it rarely lasts that long!
For serving, arrange the pieces on a festive platter. This no bake candy corn treats are perfect for Halloween parties, fall bake sales, or as a sweet addition to a dessert table. They also make a wonderful homemade gift, especially when packaged in cellophane bags tied with a colorful ribbon. You can even crush larger pieces to sprinkle over ice cream or yogurt for an extra festive touch.
Print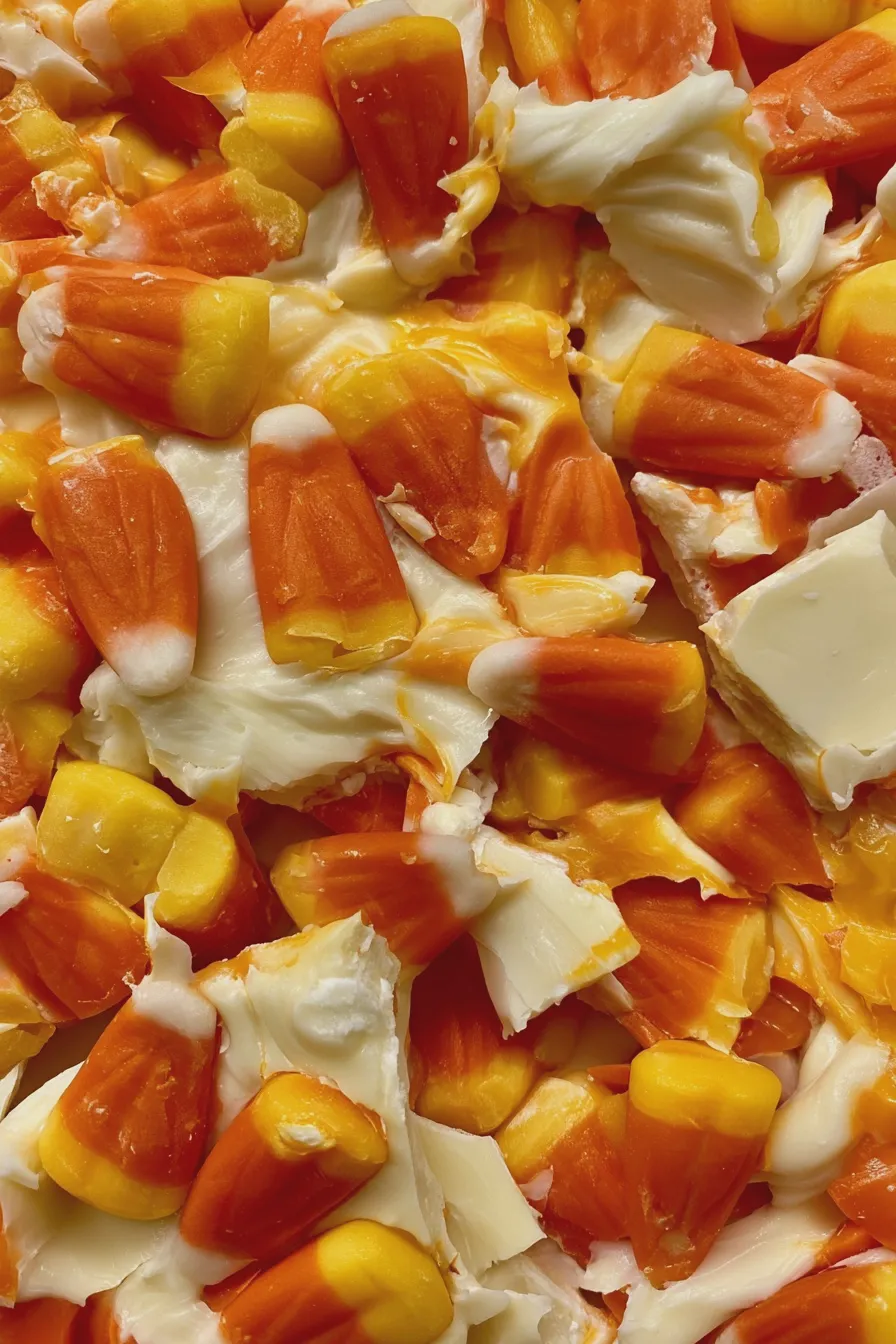

candy corn bark Recipe
- Total Time: PT1H
- Yield: 16 servings 1x
- Diet: Vegetarian
Ingredients
- 12 ounces white chocolate chips
- 1 cup candy corn
Instructions
- Line a baking sheet with parchment paper or a silicone baking mat.
- In a microwave-safe bowl, melt the white chocolate chips in 30-second intervals, stirring between each, until smooth.
- Pour the melted white chocolate onto the prepared baking sheet and spread it into an even layer, about 1/4 inch thick.
- Immediately sprinkle the candy corn evenly over the melted white chocolate. Press down gently to ensure the candy corn adheres to the chocolate.
- Allow the bark to set completely at room temperature for about 30-60 minutes, or speed up the process by placing it in the refrigerator for 15-20 minutes.
- Once fully set, break the candy corn bark into pieces. Store in an airtight container at room temperature.
Notes
- For an extra festive touch, you can add sprinkles on top of the candy corn before the chocolate sets.
- Ensure the white chocolate is completely melted and smooth before spreading, as this will affect the texture of your bark.
- If you don’t have parchment paper, a silicone baking mat works perfectly.
- Prep Time: PT10M
- Cook Time: PT0M
- Category: Candy
- Method: No-Bake
- Cuisine: American
Nutrition
- Serving Size: 1 ounce
- Calories: 150
- Sugar: 18g
- Fat: 9g
- Saturated Fat: 6g
- Carbohydrates: 17g
- Protein: 1g







